RAYMOND OGLESBY @RaymondOglesby2
July 11, 2023
This is for devices running Microsoft Outlook. Screenshots are from Microsoft Outlook 365 in Windows 10
You may have noticed that opening a link in Outlook behaves differently and not in your chosen browser. That’s because Microsoft wants to push their Edge browser, though they have some excuses for the change.
When you click on a link in Outlook for Windows, it might open in the Edge browser, even though you have chosen a different default browser in Windows settings (like Chrome or Firefox).
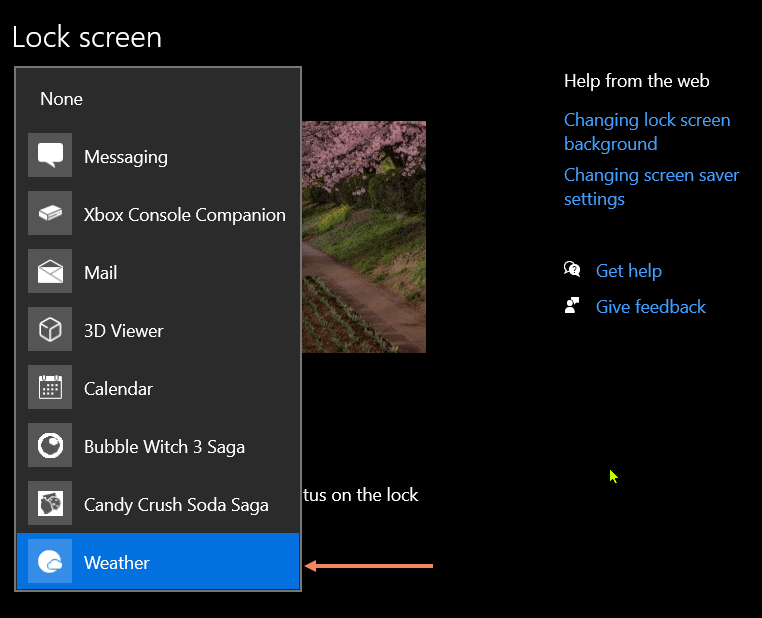
And instead of just opening the web page, the email appears in a right side-pane alongside the link you clicked. Refer to the below image:

According to Microsoft, this change means “No more disruptive switching—just your email and the web content you need to reference, in a single, side-by-side view.” They may have a point and it’s a change that suits some people.
It’s also a shameless attempt to push people to the Edge browser by overriding their browser choice with Microsoft’s preference.
This applies to Windows 10 or 11 only. Microsoft only says this is for ‘Outlook’ not which versions, but presumably Outlook 365 for Windows. For now, it only works on Microsoft-hosted emails including Outlook.com/Hotmail however it will be extended to Gmail later.
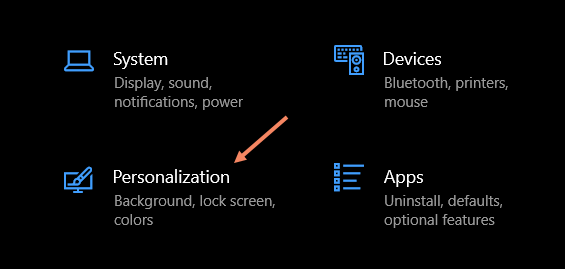
Change Browser via Windows
First, the default browser is chosen in Windows. To set up this browser, head to:
Settings | Apps | Default Apps
and choose your preferred browser. See the below image:

Change the Search Engine and Default Browser
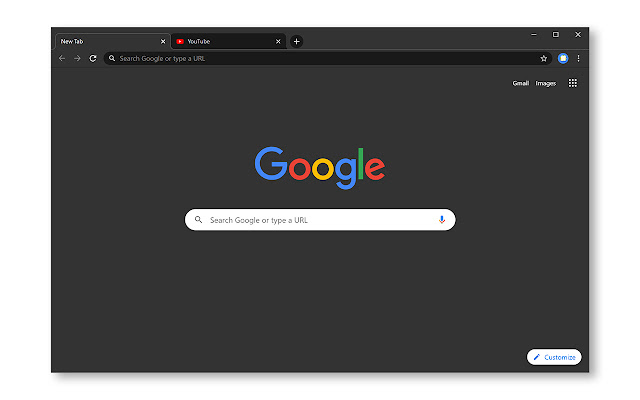
Next, for Chrome, ensure you have set the search engine. To find out, open Chrome and head to:
Menu (the 3 dots in the upper right) | Settings | Search engine
and, if necessary, set your search engine to Chrome. See the following image:

Now, for Chrome, ensure you have set the default browser. To find out, open Chrome and head to:
Menu (the 3 dots in the upper right) | Settings | Default browser
Refer to the below image:

The reason why we are doing the above is to ensure we are using Google products. You can have Firefox as your browser and Chrome as your search engine.
Change Outlook Links Default Browser
Next, open Outlook and go to:
File | Options | Advanced | Link Handling
to change the browser to Default Browser. See the below image:

Side-by-Side View May Not Work
To be honest, you may not get this feature to work no matter what combination of Outlook, Windows, and Edge you try. We prefer to test for ourselves and not take Microsoft’s word. If your email links open in your browser with no side-by-side view, do not worry.
Disclaimer
Technology is always changing and rarely is there static tech for smartphones and desktops. Thus, the contents of this post are only valid at the time of writing. Blog posts older than six months may have directions incompatible with your device or OS. Hopefully, older post content will continue to work as advertised. Thank you for reading TechSavvy.Life for Technology at Work For You.
Quote For the Day
Ideas are easy. Implementation is hard.
Guy Kawasaki
Tweet Info
That’s it. Please feel free to share this post! One way to share is via Twitter.
Just click the Tweet icon below. This will launch Twitter where you click its icon to post the Tweet.
Checkout TechSavvy.Life for blog posts on smartphones, PCs, and Macs! You may email us at contact@techsavvy.life for comments or questions.
Tweet
I Would Like to Hear From You
Please feel free to leave a comment. I would love to hear from you. Do you have a computer or smart device tech question? I will do my best to answer your inquiry. Just send an email to contact@techsavvy.life. Please mention the device, app, and version you are using. To help us out, you can send screenshots of your data related to your question.
Author’s E-Book
You can access the e-book from a Kindle device, the Kindle App for the desktop or smartphone, which is a free app.