When entering numbers into Microsoft Excel, leading zeros are removed by default. This can be problematic for ZIP codes, phone numbers, credit/debit card numbers and IDs that you type into a cell. We are going to explore some options on fixing this Excel behavior.
If you want to keep a leading zero on the fly, you can enter an apostrophe (‘) before you enter the number that begins with zero. Excel treats the number as a text field. The apostrophe (‘) is not displayed and calculations will still work. But who wants to do this every time, there has to be a better way.
This is for Excel for Office 365 Windows and Mac versions. Other versions of Excel will be similar.
Create the Excel Sheet
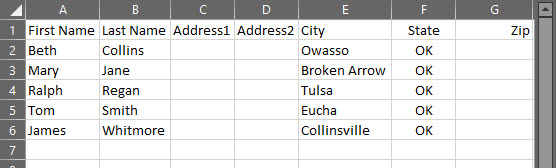
Create a simple Excel sheet like the example below:
Setup the Zip Code Format
- Select a cell or range of cells to format; in my case G2 thru G6
- Click “Ctrl+1” to load Format Cells dialog. Also, you can right click and select Format Cells.
- Select the Number tab
- Select Custom from the Category list
- In the Type box, type in 00000 for a five digit zip code or 00000-0000 for a nine digit zip code. This allows leading zeros to be placed in the cell, you only have to enter the Zip code numbers. This is not intuitive, you think you have to select a format from the list. Refer to the following image:

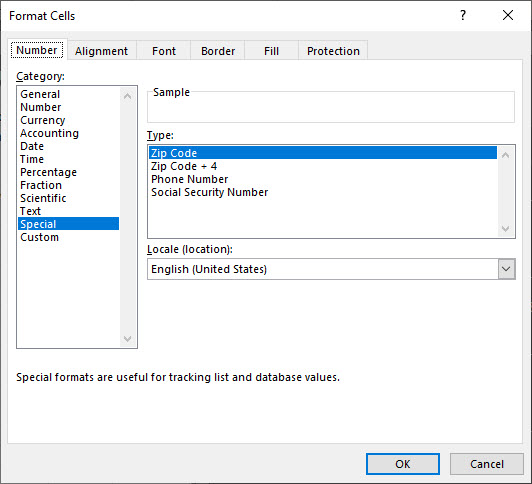
Using the Special Zip Code Format
You can also click Special, then select Zip Code or Zip Code + 4. In Google Sheets, this special Zip code format is not available, but you can enter the format of leading zeros. See the following example:
- Click OK to apply the format. The 00000 or 00000-0000 format is saved in the Type list for future use.
This will only effect Zip Codes that are entered after the format is applied.
You can also format the Zip Code as Plain Text. Anything you enter will show exactly how you typed it in text.
To do this:
- Select your data range
- Press “Ctrl+1” to launch the Format Cells dialog box
- On the Number tab, click Text
What about Zip Codes entries that have more than 5 digits? We can use a Conditional Format in an adjacent column to flag the invalid Zip codes. I used the formula; if the length (cell reference)>5 is True then present an “Invalid Zip” message, if the expression is False, then no message is presented.
Flagging Invalid Zip Codes
- Create a column adjacent to the Zip Code and label it Error Message
- Set the Conditional Format for the first cell adjacent to the Zip Code. In my example, it is cell G2
- Type in this formula, =IF (LEN(your cell reference)>5,”Invalid Zip”,””)
- Copy this formula, then highlight a range of cells, then Paste
See the following image for the Invalid Zip message related to cell G2 and G6, both have more than 5 numbers. An important note, Excel lets you enter as many digits as allowed, there is no truncation. The template of 00000 formatting is for adding leading zeros if the number of digits is less than 5.

I Would Like to Hear from You
Please feel free to leave a comment. I would love hearing from you. Do you have a computer or smart device tech question? I will do my best to answer your inquiry. Please mention the device, app and version that you are using. To help us out, you can send screenshots of your data related to your question.