This feature is for a Desktop or Laptop running Windows 10 Operating System. Your family, coworkers or friends may be in different time zones. Lets say you have friends residing in Arizona which does not observe Daylight Savings Time. How many hours are they ahead or behind your current time zone? We are going to find an easy way to do this beside searching for “time in <city>”.
This is for Windows 10 operating system
Setup Additional Time Zones
To find these settings:
Right click on the clock in the Windows 10 Taskbar (lower right)
Select Adjust date/time
Select Add clocks for different time zones under Related Settings section
See below screenshot:
Date and Time settings screenshot
Adding Two Time Zones
To add other clock(s):
Check Show this clock box
Chose a time zone
Enter a display name
Repeat above for a second time zone, its up to you
Your can add two times zones besides your current one
Click OK
See below screenshot for adding two time zones:
Adding time zone for Dhaka, Bangladesh and DaNang, Vietnam
Now when you hover your mouse over the date and time in the Taskbar you will see your time zone settings.
I Would Like to Hear from You
Please feel free to leave a comment. I would love hearing from you. Do you have a computer or smart device tech question? I will do my best to answer your inquiry. Please mention the device, app and version that you are using. To help me out, you can send screenshots of your data related to your question.
I have been blogging using WordPress as my hosting site for a couple of months. I have discovered a few tips and gotchas using WordPress that may be of interest to you.
First, if you noticed some strange highlighted text on your site, don’t panic. They will go away by exiting and relaunching your site. I had some highlighted text (in yellow) in my Categories section that I did not enter. After exiting and relaunching, the highlighted yellow text disappeared.
Second, if you have links in your posts, the linkage may add the words “opens in a new tab” at the end of your URL. This happens if you have the slider controlOpen in new tab turned off. This control is found in the drop down arrow next to the Return or the Edit (the pencil) icon). Your links will not work. You must remove the words (opens in a new tab) in the link URL. To open the link in a new tab, you must turn the slider control Open in new tab to the On position.
Third, when I am writing a post, I want to return to a previous block to add or change some text. I position the cursor in the text, but nothing happens. I am unable to add or change any text. I have to save whatever changes I have made, exit the post, then relaunch the post. Then I am able to make text changes. This is most frustrating aspect of WordPress.
Fourth, in my version of WordPress, the Dashboard does not automatically load. To get to the Dashboard, enter <your website name>/wp-admin in your browser search field. For my blog, I would enter the following in my browser: techsavvy.life/wp-admin.
I Would Like to Hear from You
Please feel free to leave a comment. I would love hearing from you. Do you have a computer or smart device tech question? I will do my best to answer your inquiry. Please mention the device, app and version that you are using. To help me out, you can send screenshots of your data related to your question.
We all have our favorite smart device apps. This would include Facebook, Twitter, Instagram, LinkedIn, Tumblr, Reddit and others. What happens when you turn off your device, power off or shutdown? These apps are still active and readily available when your device is turned back on.
These apps offer you convenient access by keeping you logged in. When you log into a financial institution, say Bank of America or Morgan Stanley, you are logged out within two minutes of no activity.
Our favorite apps should do the same. By staying logged in, the apps are more subjective to hacks by others.
Of course, by logging out, means you have to reenter a UserID, Password and Passcode, if using Two Factor Authentication, to gain access. And that can be a pain but it’s worth it.
If you are selling or disposing a smart device, you should log out all apps. Also, you may consider erasing all data and/or resetting your device. Only do this if you no longer need the device.
I would like the app industry to follow the same logging out protocol as financial entities. What do you think? Please take the one question survey.
I Would Like to Hear from You
Please feel free to leave a comment. I would love hearing from you. Do you have a computer or smart device tech question? I will do my best to answer your inquiry. Please mention the device, app and version that you are using. To help me out, you can send screenshots of your data related to your question.
Do you want to save electricity? Shutting down your Windows 10 Desktop or Laptop at a specific date and time is one answer. Normally, we walk away from our computer at the end of the day. At some point, your PC will slip into hibernation or sleep mode, which saves power consumption but we are going to save even more electricity plus reduce heat buildup.
The Windows operating system has a Task Scheduler which allows us to setup a shutdown at a specific date and time. This Scheduler has been around since Windows XP. By setting up a scheduled task, we are going to shut down your PC at a specific time. I am going to walk you through the setup process screen by screen.
The steps are for Windows 10 operating system. The Task Scheduler is for Windows XP through Windows 10
In the Cortana search box, type in “task scheduler“ (without the quotes)
Open the Task Scheduler. See following image:
Opening the Task Scheduler
Create the Auto Shutdown Task
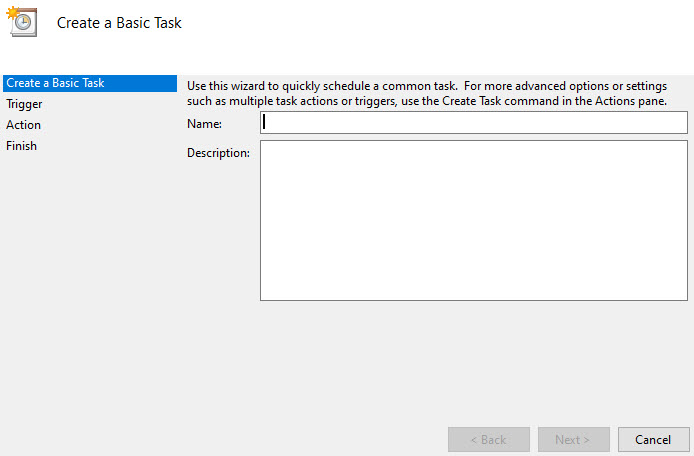
Select Create Basic Task. See following image:
Creating a Basic Task
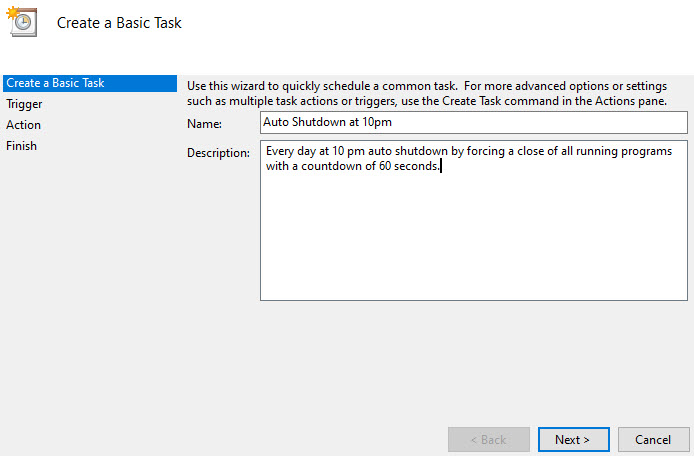
Give the Task a name and a description. I am using Auto Shutdown at 10 pm as the name. See following image:
Assigning a Name and Description to our scheduled task
Set the Task Triggers
Click Next at the bottom of the screen to open the Task Trigger screen
Select Daily (the default). See the following image:
Selecting the Task Trigger
Select Next
Select a Start: date and time
Set Recur every: 1 day (the default). See below image:
Setting the start date, time and the recurrence of the scheduled task
Set the Task Action
Select Next. You will see the Action screen
Select Start a program (the default). See below image:
Selecting the Action we want to perform
Set the Task Arguments
Click Next
In the Program/script box, enter “shutdown” (without the quotes)
Enter -s -f -t 60 in the Add arguments box. See following screen:
Entering the program name and arguments for the scheduled task
These arguments are part of the shutdown.exe program. The -s tells Windows to shutdown, you could enter -r for a shutdown and Restart. The -f forces all running programs to close and is implied if the -t argument is greater than 0. The -t 60 adds a 60 seconds countdown, if you want an immediate shutdown, change to -t 0. See following image:
Setting the program name and arguments
View Your Task Summary
Click Next and you will see your Summary screen. See below image:
A Summary of the scheduled task
Click Finish
Close the Task Scheduler. For our example, we are initiating a daily shutdown starting on 2/5/2020 at 10pm by closing all running applications with a 60 seconds countdown.
View, Edit or Delete Your Scheduled Task
Open Task Scheduler
Click on Task Scheduler Library
Find your task under the Name column and highlight it. You can view your Triggers and Actions under the appropriate tab. See following image:
Viewing your scheduled task
To Edit your task, highlight the task and select Properties. I recommend you go through each tab and make any necessary change(s). Click OK to apply your change(s).
To Delete the task, highlight the task and select Delete. Click Yes to complete the deletion.
Close the Task Scheduler
You are finished. At the designated date and time, watch your computer automatically shutdown. In our example, the auto shutdown occurs every day at 10 pm..
I Would Like to Hear from You
Please feel free to leave a comment. I would love hearing from you. Do you have a computer tech question? I will do my best to answer your inquiry. Please mention the app and version that you are using. To help me out, you can send screenshots of your data related to your question.
I ran across this neat feature of Microsoft PowerPoint that I want to share with you. As a presenter, you are in control of what is being displayed. Instead of presenting all your bullet points at once lets dim there appearance one at a time. The “dim text” feature allows the audience to focus on one topic. For my example I am using a single slide with five bullet points.
This is for PowerPoint for Office 365 Windows and Mac versions. Other versions of PowerPoint will be similar.
Launch PowerPoint
Open PowerPoint on your Desktop/Laptop or Mac
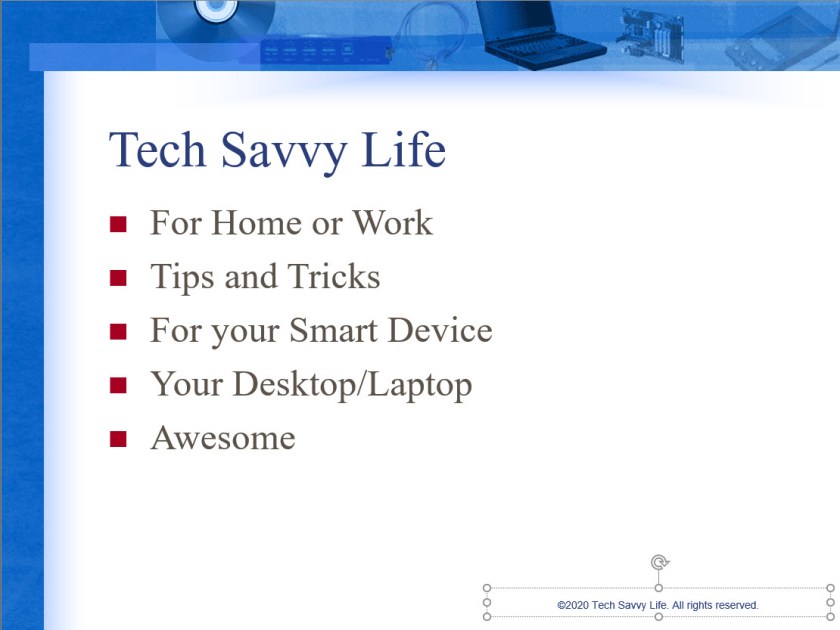
Find a slide that contains bullet points or text you want to dim. See my example below:
PowerPoint Slide Bullet Points screen
Highlight a bullet point or text
Select the Animations tab and choose the Appear animation
Set Animations
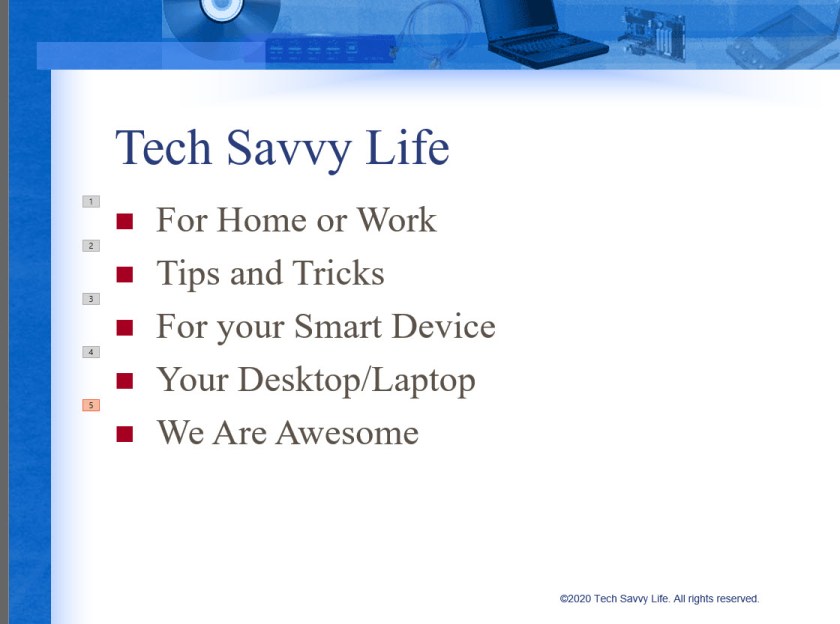
The animation will be successfully applied if you see a number next to the bullet point or slide.
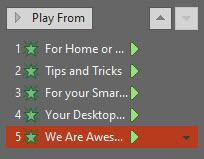
Repeat the above steps until you have applied an animation to each bullet point or text. Refer to the following image:
PowerPoint Slide with Animation applied screen
Select all the Animations by using the “Ctrl” key and clicking on each animation.
Select the arrow next to the right side of the animation
PowerPoint Animations screen
Set Effects
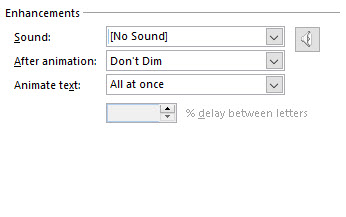
Select Effect Options. See following image:
PowerPoint Effects screen
Change Behavior for Dimming
We are going to change the behavior of the default Don’t Dim option by clicking the arrow next to the item (a drop down box selection) and select a color slightly different than your bullet points or text. You want your color selected to be visible to the audience. For my example, I selected a light red color:
PowerPoint Color Selection for Animation screen
Click OK
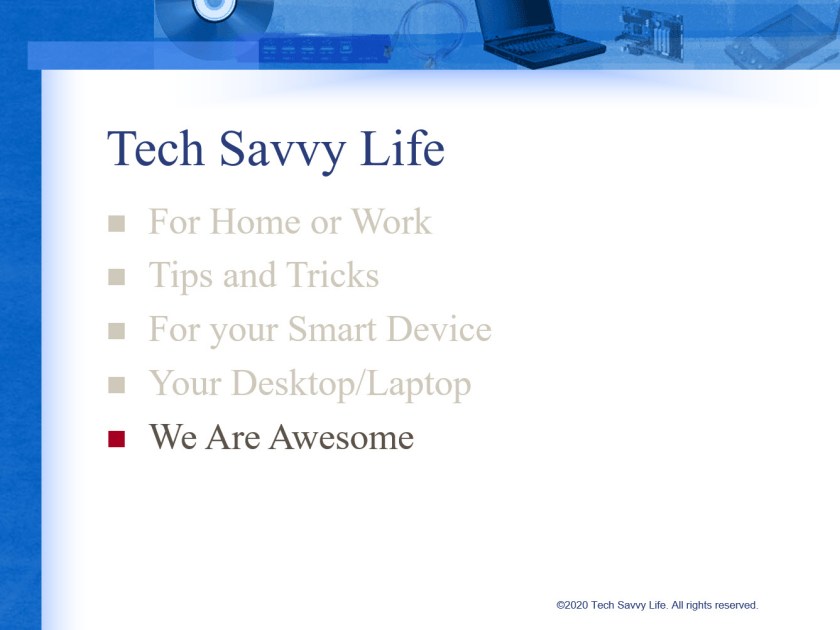
Test Your Slide
Now its time to test out your slide. You should see something like the following screen as you manually or automatically select each bullet point.
PowerPoint using the Dim Feature
This is a nifty feature for your next text presentation. Save your slide or presentation, you are finished.
I Would Like to Hear from You
Please feel free to leave a comment. I would love hearing from you. Do you have a computer tech question? I will do my best to answer your inquiry. Please mention the app and version that you are using. To help me out, you can send screenshots of your data related to your question.
Do you want to protect your Microsoft Excel workbook or a sheet in your workbook? If so, this blog post is for you. We are going to password protect a workbook, protect a sheet in a workbook and the Excel file itself.
This is for Excel for Office 365 Windows and Mac versions. Other versions of Excel will be similar.
Protect a Workbook
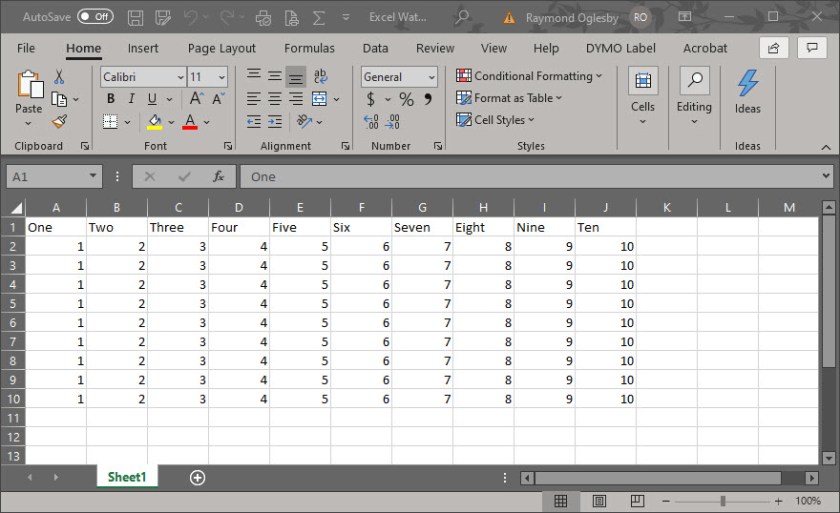
I recommend you start with a blank Excel workbook, just in case you forget a password. To assign a password to an Excel workbook, do the following:
Open a blank Excel workbook. For demonstration purposes, I am using an Excel workbook that contains one sheet with cell data. You can choose an existing Excel workbook if you chose. See my workbook below :
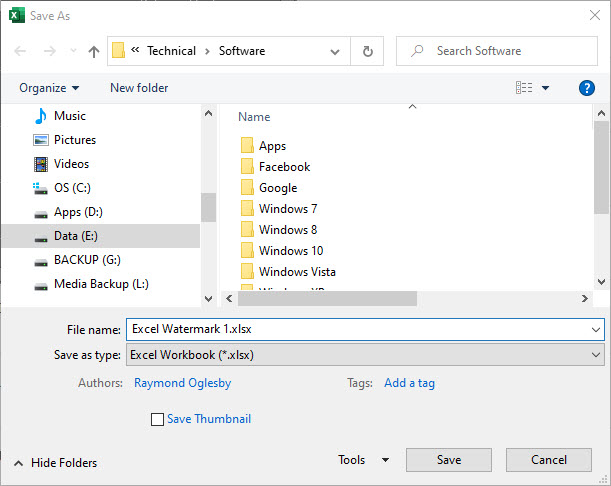
Select File>Save As
Select More options (underneath Excel Workbook drop down box)
Select the Tools drop down box
Chose General Options
Set the Password(s)
You will see notice two password boxes, one to open the workbook and one to modify the workbook
Enter one or both passwords. Make sure you write down these passwords and store them in a safe place.
You have two other options to set if you chose, Always create backup and Enable Read-only recommended. The first is self explanatory. The second option is an extra layer of protection by enabling the workbook to read-only status upon opening.
Confirm your password(s) by reentering the password(s)
Click OK
Click Save
Close or Exit Excel
Note! A user who doesn’t know the second password can open and view the data by clicking the Read Only option. This user can still modify the data, but they are unable to save their changes to the protected workbook. However, the user can save the workbook under a new name, which circumvents the protection process. Of course, password-cracking software will get you into the workbook.
Protect a Sheet
Open a blank Excel workbook. For demonstration purposes, I am using an Excel workbook that contains one sheet with cell data. You can choose an existing Excel workbook if you chose.
Select the Review tab
Click the Protect icon
Click Protect Sheet icon. Refer to following image:
Enter your password in the Password to unprotect sheet box
Click OK
In the Confirm Password dialog box, type the password again
Click OK
Save your changes
Close or Exit Excel
Tip! To remove a password, click Protect>Unprotect Sheet and enter your password. You can also select Protect Workbook icon to protect a workbook which follows.
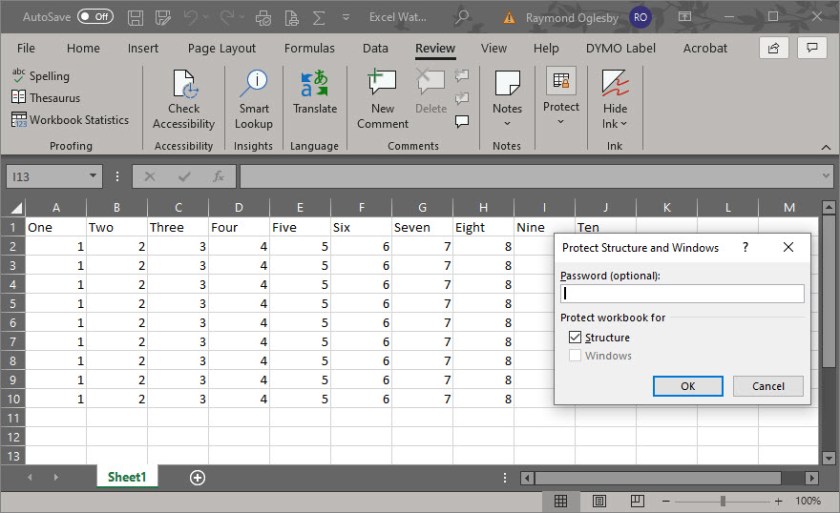
Protect Excel Structure
Open a blank Excel workbook. For demonstration purposes, I am using an Excel workbook that contains one sheet with cell data. You can choose an existing Excel workbook if you chose.
Select the Review tab
Click the Protect icon
Click Protect Workbook icon. Refer to the following image:
Select the Windows option if you want to prevent users from moving, resizing, or closing the workbook window or hide/unhide windows
Enter your password
Click OK
In the Confirm Password dialog box, type the password again
Click OK
Save your changes
Close or Exit Excel
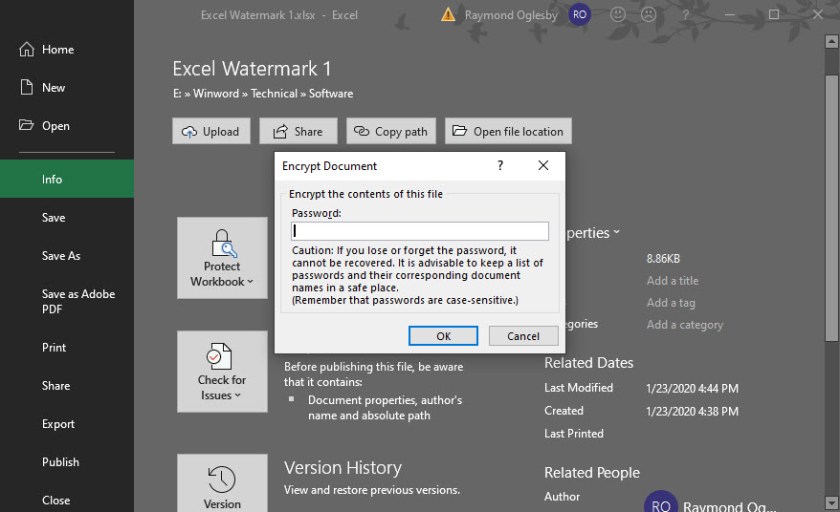
Protect the Excel File
To prevent users from accessing the data in your Excel file, we are going to protect the file with a password
Open a blank Excel workbook. For demonstration purposes, I am using an Excel workbook that contains one sheet with cell data. You can choose an existing Excel workbook if you chose.
Select File>Info. Refer to my image below:
Click Protect Workbook icon
Chose Encrypt with Password option
Enter a password in the Encrypt Document dialog box
Click OK
In the Confirm Password dialog box, type the password again
Save your changes
Close or Exit Excel
Be cautious when sharing files or passwords with other users. You still run the risk of passwords falling into the hands of unintended users. Remember to write down your passwords and store them in a safe place.
I Would Like to Hear from You
Please feel free to leave a comment. I would love hearing from you. Do you have a computer tech question? I will do my best to answer your inquiry. Please mention the app and version that you are using. To help me out, you can send screenshots of your data related to your question.
You can “pull on that drawer” like the above image to get your PC in shape or follow this blog post.
I have discussed various programs on fine tuning your PC in previous posts. This is a summary post of those programs, all in one place. I have done this fine tuning on many kinds of machines and operating systems in 15 countries as well as the USA. All these programs are free or available on a trial basis.
Some friends of mine had rather take their PC to a geek shop for a reformat of their hard drive and a fresh copy of Microsoft Windows every six months. They spend hundreds of dollars in doing this, which is unnecessary.
You have a choice of following the steps below or paying a consultant (like myself) or paying a geek shop to fine tune your PC. But its not hard to do it on your own. It takes one to three hours about every three to six months. If you haven’t already done so, you will need to download and install the following programs. You only have to do this once, then just run the programs. The links provided below walk you through downloading, installing and running these applications.
This is for a Windows based operating systems
Download and Install Applications
DriverMax (paid or trial version) or a similar free program like Driver Booster
Uninstall applications not being used through the Apps and Features. In the Cortana search box. type “Uninstall Programs” (without the quotes) to load the feature to uninstall your unneeded programs
Check your device driver updates using DriverMax(paid or trial program) or a similar free program like Driver Booster
Run Belarc Advisorfor a status of your PC, especially for anti virus software definitions and missing Windows Updates and apply updates as necessary
Check your startup applications and missing entries using Autoruns
That’s it. Your PC will now run faster and be more stable!
I Would Like to Hear from You
Please feel free to leave a comment. I would love hearing from you. Do you have a computer tech question? I will do my best to answer your inquiry. Please mention the app and version that you are using. To help me out, you can send screenshots of your data related to your question.
The Registry keeps growing when you use Windows, so does the obsolete items in the Registry, which would eventually lead to performance degradation and even system crashes. Wise Registry Cleaner scans the Windows Registry and finds errors and residual items in the Registry and then cleans or defrags them. By fixing these residual and corrupted items in Windows Registry, your system will run faster and be more stable.
I highly recommend this software utility. I have used this software on many PCs throughout the world. Best of all, there is a free version. This software is a companion product to Wise Disk Cleaner as discussed in a previous post. In troubleshooting a PC, I use them both to clean up a computer.
Its been my experience to find the best free program that does one thing very well. Although CCleaner has a Registry cleaner, I do not recommend it, instead use this software.
This is for a Windows based operating system from XP to Windows 10
You will see the download file in the lower left of your screen
Click or double click to install the software and follow the simple instructions
A desktop/laptop shortcut will be added
Close other running program(s)
Empty your Recycle Bin
Click or double click the shortcut to run
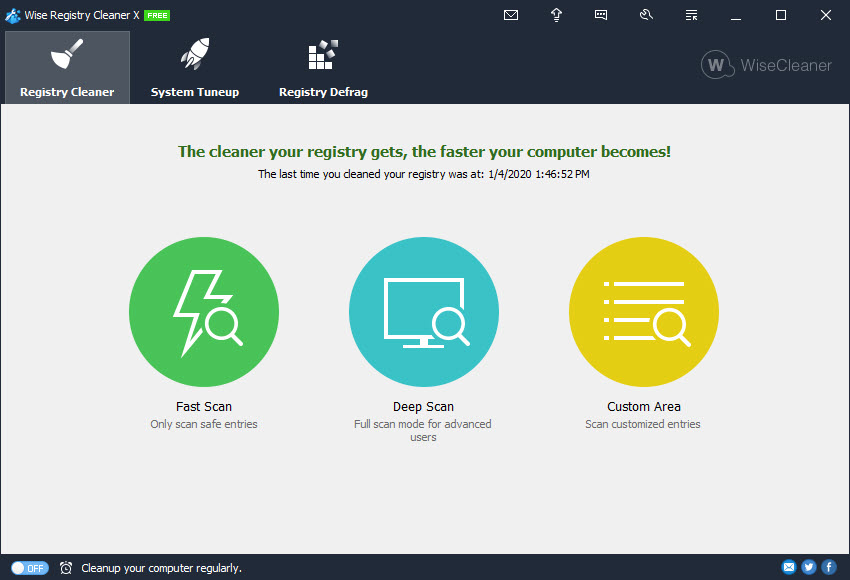
Following image is after an install. Your screen should look similar:
Wise Registry Cleaner main screen
Backup Before Running
Although the program sets a Restore Point and a Backup of the Registry, I prefer doing this procedure manually. To view these options, refer to the last image in this post.
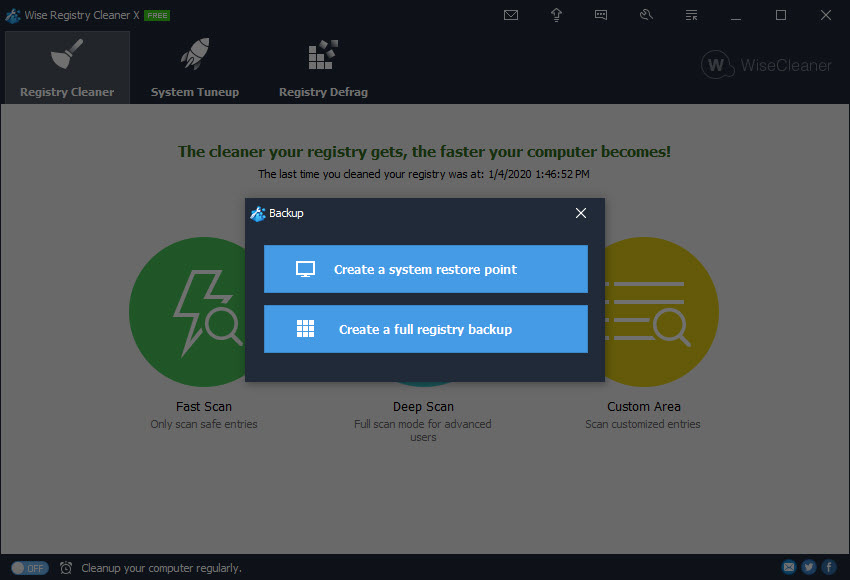
First, we want to create a System Restore point and a backup of the Registry as a safety precaution in case something goes wrong. See the following screenshot:
Wish Registry Cleaner Restore and Backup options
Select the Create a system restore point button. Once finished you will see the following popup image:
Creation of System Restore completed
Click OK
Repeat above steps, but this time select Create a full registry backup button
When finished, your are taken back to the main program screen.
Run the Software
Click the Quick Scan icon to begin scanning your Registry. After completion, you will see a similar screenshot:
Results of Wise Registry Cleaner run
Click the Clean button to fix your Registry. Your results screen will be similar to the below image:
Wise Registry Cleaner complete
That’s it. You are done. If you want to setup a schedule for checking updates:
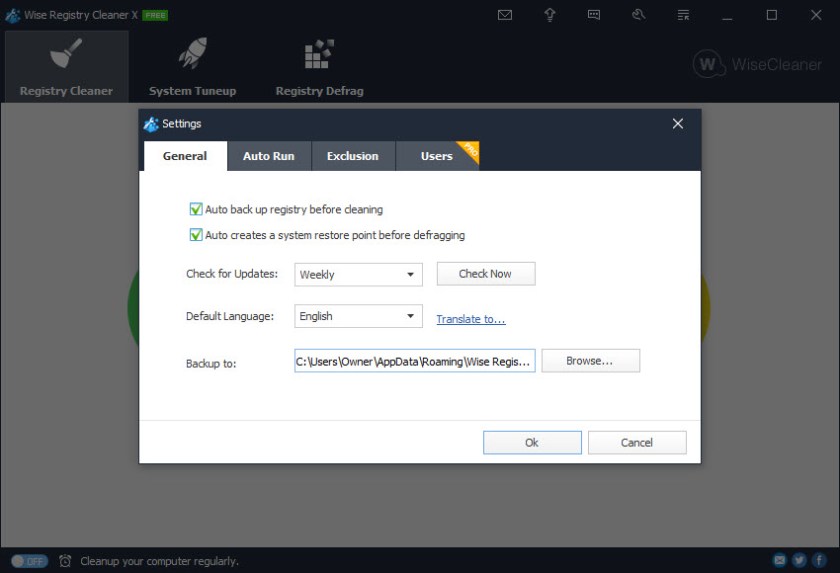
Click on Settings from the top of the main program screen
Select the General and change when to check for updates; I recommend keeping the default to Weekly.
Wise Registry Cleaner Pro has a Scheduler option and many others.
Your screen should look like the following:
Close the program
Restart your machine
I Would Like to Hear from You
Please feel free to leave a comment. I would love hearing from you. Do you have a computer tech question? I will do my best to answer your inquiry. Please mention the app and version that you are using. To help me out, you can send screenshots of your data related to your question.
Over time, junk files, temporary files, all kinds of system files and other items you do not need at all accumulate on your Windows computer. Those useless files take up valuable hard disk space and slow down your computer. Wise Disk Cleaner can delete these unnecessary files on your hard disk to free up disk space and make your computer run faster. It also provides many custom options to allow users to clean up more files they don’t need. Wise Disk Cleaner can scan and remove them quickly, making it one of the most efficient disk cleaners out there
I highly recommend this software utility. I have used this software on many PCs throughout the world. Best of all, there is a free version. This software is a companion product to CCleaner as discussed in a previous post. In troubleshooting a PC, I use them both to clean up a computer.
This is for a Windows based operating system from XP to Windows 10
You will see the download file in the lower left of your screen
Click to install the software and follow the simple instructions
A desktop/laptop shortcut will be added
Close any running program(s)
Empty your Recycle Bin
Click or double click the shortcut to run
After installation you will see the following image:
Wise Disk Cleaner install
Run the Software
Click the Scan button to begin
Your screen will be similar to the following image:
Wise Disk Cleaner scan
Notice the results of my scan; the number of files to be deleted, the disk space to be saved and number of Traces to be deleted are shown. Traces are messages that can occupy a large amount of disk space, and they can be deleted without effecting your PC. When you run this software for the first time, do not be surprised at the scan results.
Click the Clean button to delete the files
You may receive popup menus regarding closing your browser like the image below:
Google Chrome popup
Click Yes
In my case, I responded with a No because I needed my browser running to document this post. Normally, you would respond with a Yes.
The Results
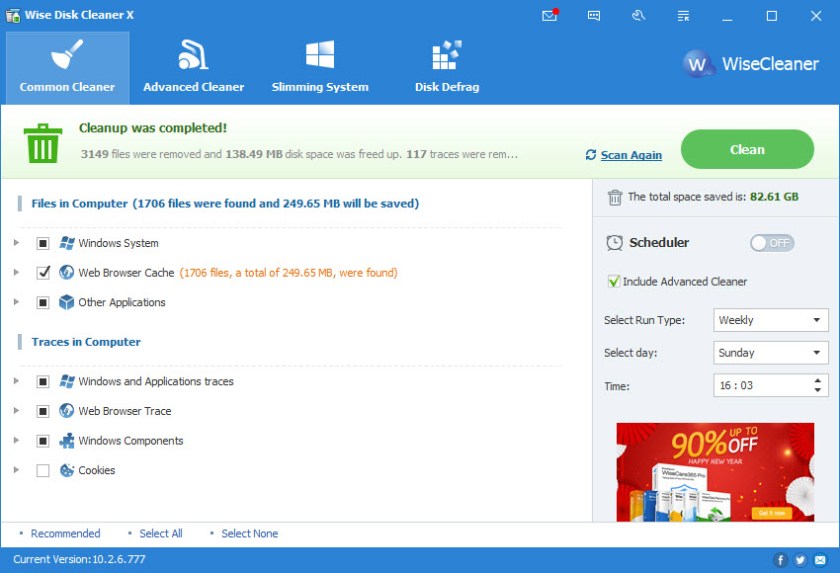
After cleaning, you will see the results like the image below:
Wise Disk Cleaner results
That’s it, you are done. You may set up a schedule on when to run the software. I recommend you run this program weekly.
Close the program
Restart your PC
I Would Like to Hear from You
Please feel free to leave a comment. I would love hearing from you. Do you have a computer tech question? I will do my best to answer your inquiry. Please mention the app and version that you are using. To help me out, you can send screenshots of your data related to your question.
Are your device drivers up-to-date on your PC? How would you know? You don’t unless you visit each manufacture for their latest driver for each device in your PC. My favorite program for device updates is DriverMax. When you run this program for the first time, don’t be surprised at the number of drivers that are out of date.
I have used this utility software for several years. The software does one task; update your PC drivers. There is a trial version for you to check out. I recommend purchasing the Pro version.
You can find driver updates for 32-bit and 64-bit versions of Windows 10, Windows 8.1, Windows 8, Windows 7, Windows Vista, and Windows XP.
DriverMax analyzes your existing drivers and provides the latest versions for over 2.3 million devices.
DriverMax automatically tests each new driver before installing it on your PC. In addition, it backs up the current drivers and creates a system Restore Point, allowing a quick rollback of the installation.
Starting DriverMax
The following is a screenshot of DriverMax at startup:
DriverMax install
Running DriverMax
Just click on the Scan… button to begin. The following screenshot is my results from my PC. I have two drivers that are out of date. Just click on the Download and Install button and take a short break while the drivers are being updated.
DriverMax results
DriverMax has a Backup and Restore feature. As mentioned above, the program automatically creates a Restore Point when you are updating any drivers. You can click on the Backup tab to manually create a Restore Point. The Restore tab lets you roll back your latest driver updates if something goes wrong.
DriverMax Notifications
You will receive notifications in your Tray Bar (as shown below) when new drivers are detected.
I Would Like to Hear from You
Please feel free to leave a comment. I would love hearing from you. Do you have a computer tech question? I will do my best to answer your inquiry. Please mention the app and version that you are using. To help me out, you can send screenshots of your data related to your question.