I recently read a post about finding your Microsoft Windows 10 product key. Microsoft likes to hide it but there are occasions you need to know the key. The key is a 25-characters code, making it virtually impossible to remember.
This is for Windows XP through 10 devices
Copyright Scott Adams, Inc./Distributed by Universal Uclick for UFS
That post gave a long command to use and a complicated Visual Basic Script (vbs) from an unknown author to be saved as a text file to run. To make things even more complicated, using two methods, the author showed two different keys. But there is a pain free way to find the key that I posted about using Belarc Advisor. This free software program is among the best to provide a detailed inventory of your device’s hardware and software.
Scroll down the report till you see the Software Licenses section. There you will find your Windows product key plus other software keys. See below image:
I Would Like to Hear from You
Please feel free to leave a comment. I would love hearing from you. Do you have a computer or smart device tech question? I will do my best to answer your inquiry. Please mention the device, app and version that you are using. To help me out, you can send screenshots of your data related to your question.
The author’s Vietnam eBook on the Battle for Tra Bong: Events and Aftermath
In PowerPoint, it’s hard to remember what slide number you are presenting. As an aid, we can add the slide number to our slides.
One way, we could manually add a number using a text box. But what if you added or deleted a slide? This would require you to manually update your slide numbers; a time consuming and error prone task.
Instead, you can have the slide numbers update automatically on all your hidden and active slides. By default, your slide numbers appear in your slide footer, but you can move and format them.
This is for PowerPoint for Office 365 Windows and Mac versions. Other versions of PowerPoint will be similar.
Copyright Scott Adams, Inc./Distributed by Universal Uclick for UFS
Adding Slide Numbers
Open a PowerPoint presentation with several slides to see the feature. Click the Insert tab. In the Text section, click the Header & Footer icon. See below image:
Text dialog box
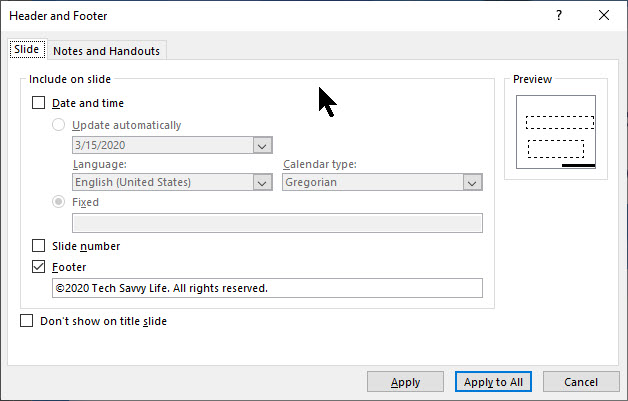
The Header & Footer options box will open. Refer to below image:
Slide Header and Footer options
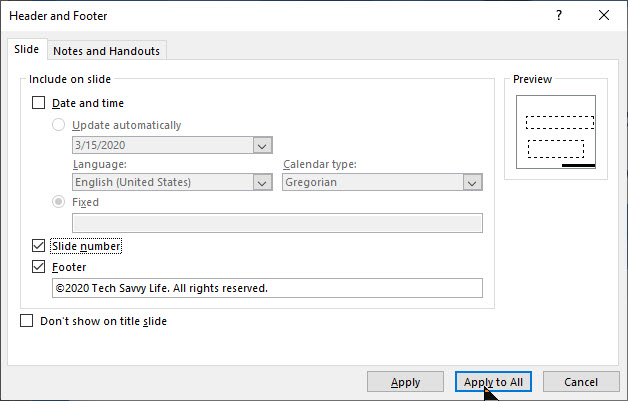
Under the Slide option, place a check in the Slide number checkbox. To add your slide number to all of your slides, select Apply to All button. Refer to below image:
Checkmarking the Slide Number option
Your slide number will appear in the bottom right corner. Note! The number place holder will be small. See following image:
Sliode Number placeholder
Remove Slide Numbers
To remove your slide numbers, follow the steps above. In the Header & Footer options options box, simply uncheck the Slide number checkbox. Then click Apply to All button. Your slide numbers will be removed.
Format Slide Numbers
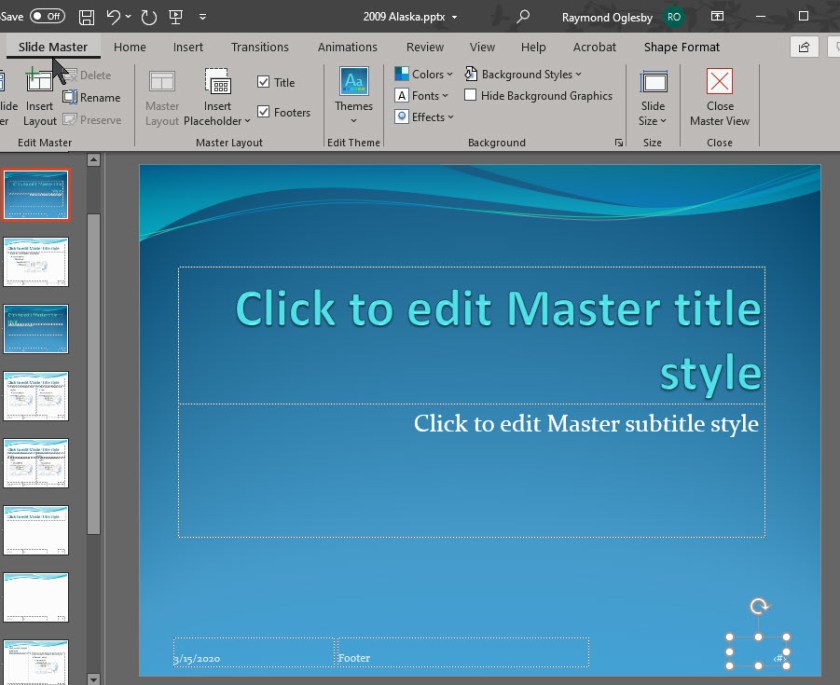
We are going to use PowerPoint Slide Master to make the slide number in a different font, color, size or position.
To do this, click View from the main menu, then select Slide Master. This will load the Slide Master editing box. You will see the slide number box in its default position at the bottom right section of the slide. See following image:
Accessing the Slide Master
Note! You could add a text box with the word “Slide” next to the slide number; this is not shown.
When you move or apply a different font, size or color, it will apply to all your slides.
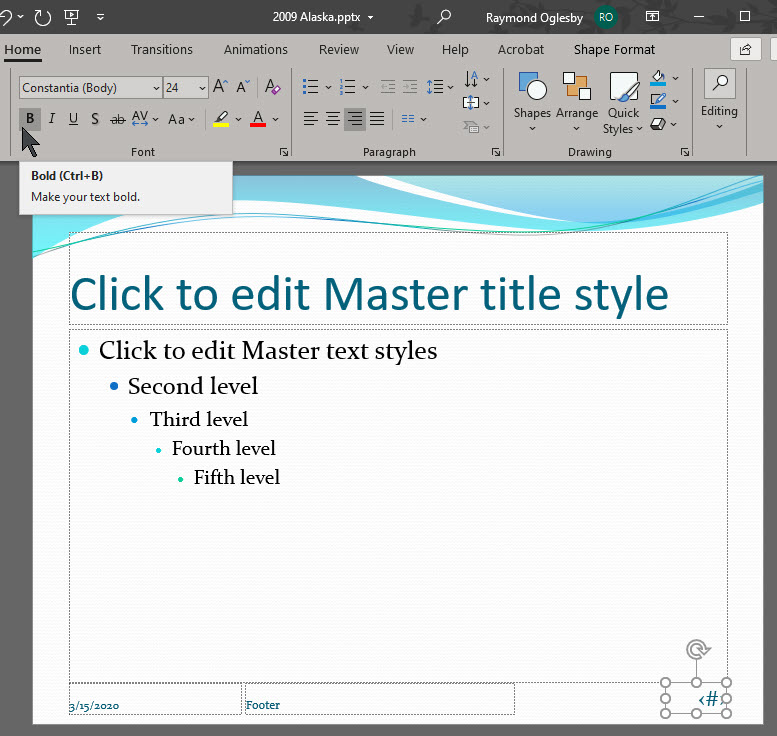
To edit the text box, select the box then select the Home tab. See below image:
Selecting the Home tab for editing
Then you can use the available options in the Font and Paragraph sections to format the number like choosing Bold, Underline, etc. I have set the number to be Bold and made the font size bigger. See below image:
Editing the Slide Number placeholder
Once you have finished editing, return back to the Slide Master tab and click Close Master View button. Refer to below image:
Closing the Slide Master
Be sure to Save your presentation with the automatic slide numbering feature.
Please feel free to leave a comment. I would love hearing from you. Do you have a computer or smart device tech question? I will do my best to answer your inquiry. Please mention the device, app and version that you are using. To help me out, you can send screenshots of your data related to your question.
The author’s Vietnam eBook on the Battle for Tra Bong: Events and Aftermath
We know we can pin Apps to the taskbar. But did you know you can pin your drives, both local and network drives. Instead of opening File Explorer and choosing a drive which requires two clicks, this can be done in one click from your taskbar.
This is for Windows 10 devices
Copyright Scott Adams, Inc./Distributed by Universal Uclick for UFS
Create a Shortcut for a Drive
Create a shortuct by a right click on the desktop. Then select New followed by Shortcut from the menu. Refer to below image:
Creating a shortcut
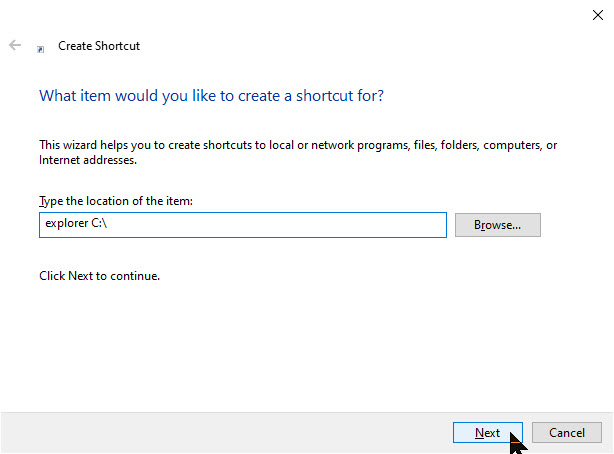
The shortcut wizard will appear. (If the wizard does not appear, you will have to manually edit the Shortcut tab.) In the field Type the location of the item, enter explorer C:\. See below image:
The first screen of the shortcut wizard
Click Next. Assign a name to the shortcut like Drive C. See following image:
The second screen of the shortcut wizard
To complete the wizard, click Finish. The shortcut will be displayed on your desktop. Right click on the the desktop shortcut and select Properties from the context menu to preview the shortcut. Notice the Target and Start in fields have been updated. See below image:
Setting up a shortcut for drive C
Change the Icon for the Shortcut
Again, right click on the shortcut and select Properties from the context menu. Go to the Shortcut tab and select Change Icon. You will see an Address field that denotes the default location of the icon. To change this, enter C:\Windows\system32\imageres.dll in the field. Refer to below image:
Changing the default location for the icon
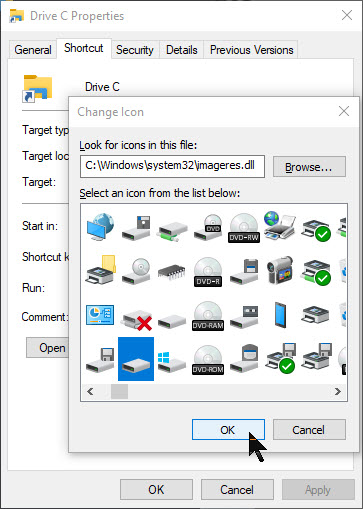
Click OK. Look through the icons and choose the drive icon. You could also use your own custom icon. See following image:
Choosing the drive icon
Click OK to select the icon. Then click OK again to save your changes. Then right click on your desktop shortcut and select Pin to taskbar and/or Pin to Start from the context menu. See below image for the final result of pinning Drive C to the taskbar:
Drive C example pinned to the taskbar
From your taskbar, click the drive icon to open File Explorer for the designated drive. You may now delete the desktop shortcut.
If you are pinning multiple drives, it’s a good idea to use custom icons. If you go with the default icons, they will all look the same. You could hover your mouse over a pinned drive to reveal which drive will open or use a custom icon. Another idea is to remember which drive is which. To make the icons stand out, you could separate the pinned drives from your other apps by using taskbar dividers.
I Would Like to Hear from You
Please feel free to leave a comment. I would love hearing from you. Do you have a computer or smart device tech question? I will do my best to answer your inquiry. Please mention the device, app and version that you are using. To help me out, you can send screenshots of your data related to your question.
The author’s Vietnam eBook on the Battle for Tra Bong: Events and Aftermath
This post will show you how to allow easy access to your favorite websites. We will discuss adding a desktop shortcut for any website to your Windows 10 Taskbar or Start Menu.
This is for Windows 10 devices
Using Google Chrome
Navigate to the website you want to pin
Click the Menu icon (the one with the 3 dots) in upper right hand corner
Hover your mouse over More Tools
Click Create Shortcut
In the popup menu, change the name of the shortcut, if desired
Click Create. See below image:
Creating Desktop shortcut for pinning
This will create a desktop shortcut. Refer to below image for my techsavve.life shortcut at the bottom:
If you select the option Open in window, Chrome will open the page in its own window.
Right click on the shortcut and either click Pin to Start or Pin to taskbar. Once you have pinned the website for one or both ways, you can delete the desktop shortcut.
Using the new Microsoft Edge
The new Microsoft Chromium based browser works similar to Google Chrome. Yes, Microsoft has embraced the Chrome browser, even the version number is the same.
Navigate to the website you want to pin
Click the Settings and more icon (the one with the 3 dots) in upper right hand corner
Hover your mouse over More Tools
Click Pin to taskbar
The new Edge has a new feature called Launch taskbar pinning wizard. It is located just below Pin to taskbar in the menu dialog box.
Click the wizard. Edge will guide you through a short menu that lets you pin the most popular websites and Microsoft web apps to your taskbar. See below image for the first of the three screen wizard:
The Pin to to the taskbar wizard, one of three screens
Note! The new Edge does not have the feature Pin to Start
The Classic Edge
The classic version of Edge came with the original version of Windows 10. If you have yet to update to the new Edge, then use the following for pinning:
To pin the website to the Taskbar:
Navigate to the website you want to pin
Click the Menu icon (the one with the 3 dots) in upper right hand corner
Click Pin this page to the taskbar
To pin the website to the Start menu:
Navigate to the website you want to pin
Click the Menu icon (the one with the 3 dots) in upper right hand corner
Hover your mouse over More Tools
Click Pin this page to Start
You can now delete any created desktop shortcut(s).
I Would Like to Hear from You
Please feel free to leave a comment. I would love hearing from you. Do you have a computer or smart device tech question? I will do my best to answer your inquiry. Please mention the device, app and version that you are using. To help me out, you can send screenshots of your data related to your question.
The author’s Vietnam eBook on the Battle for Tra Bong: Events and Aftermath
When entering numbers into Microsoft Excel, leading zeros are removed by default. This can be problematic for ZIP codes, phone numbers, credit/debit card numbers and IDs that you type into a cell. We are going to explore some options on fixing this Excel behavior.
If you want to keep a leading zero on the fly, you can enter an apostrophe (‘) before you enter the number that begins with zero. Excel treats the number as a text field. The apostrophe (‘) is not displayed and calculations will still work. But who wants to do this every time, there has to be a better way.
This is for Excel for Office 365 Windows and Mac versions. Other versions of Excel will be similar.
Create the Excel Sheet
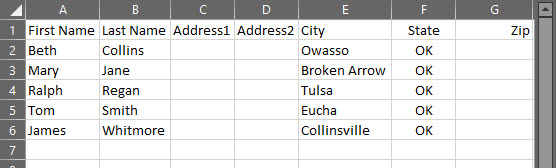
Create a simple Excel sheet like the example below:
Excel Sheet for Zip Codes
Setup the Zip Code Format
Select a cell or range of cells to format; in my case G2 thru G6
Click “Ctrl+1” to load Format Cells dialog. Also, you can right click and select Format Cells.
Select the Number tab
Select Custom from the Category list
In the Type box, type in 00000 for a five digit zip code or 00000-0000 for a nine digit zip code. This allows leading zeros to be placed in the cell, you only have to enter the Zip code numbers. This is not intuitive, you think you have to select a format from the list. Refer to the following image:
Setup Excel Sheet format
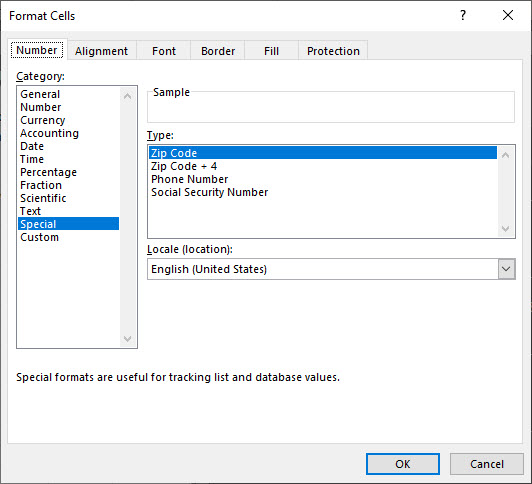
Using the Special Zip Code Format
You can also click Special, then select Zip Code or Zip Code + 4. In Google Sheets, this special Zip code format is not available, but you can enter the format of leading zeros. See the following example:
Excel Special Zip Code format
Click OK to apply the format. The 00000 or 00000-0000 format is saved in the Type list for future use.
This will only effect Zip Codes that are entered after the format is applied.
You can also format the Zip Code as Plain Text. Anything you enter will show exactly how you typed it in text.
To do this:
Select your data range
Press “Ctrl+1” to launch the Format Cells dialog box
On the Number tab, click Text
What about Zip Codes entries that have more than 5 digits? We can use a Conditional Format in an adjacent column to flag the invalid Zip codes. I used the formula; if the length (cell reference)>5 is True then present an “Invalid Zip” message, if the expression is False, then no message is presented.
Flagging Invalid Zip Codes
Create a column adjacent to the Zip Code and label it Error Message
Set the Conditional Format for the first cell adjacent to the Zip Code. In my example, it is cell G2
Type in this formula, =IF (LEN(your cell reference)>5,”Invalid Zip”,””)
Copy this formula, then highlight a range of cells, then Paste
See the following image for the Invalid Zip message related to cell G2 and G6, both have more than 5 numbers. An important note, Excel lets you enter as many digits as allowed, there is no truncation. The template of 00000 formatting is for adding leading zeros if the number of digits is less than 5.
Flagging Invalid Zip Codes screen
I Would Like to Hear from You
Please feel free to leave a comment. I would love hearing from you. Do you have a computer or smart device tech question? I will do my best to answer your inquiry. Please mention the device, app and version that you are using. To help us out, you can send screenshots of your data related to your question.
The author’s Vietnam eBook on the Battle for Tra Bong: Events and Aftermath
If you forget your Windows 10 login PIN, you won’t be able to retrieve it. However, you can change it. If you don’t use a PIN, normally you would signin using a Password. There are other signin options, but the PIN and Password are the most commonuly used.
Using the PIN makes it much easier and faster to login. Before resetting you PIN, I advise you to create a Password Reset Disk.
I was using the guidelines in this post to reset my PIN. I canceled out of the process. That prompted Windows 10 to delete my PIN. I attempted to login with my PIN, but it was gone. Then, I tried using my Password, but I had the wrong Password. After spending an hour or so trying to login and reading help guidelines on my iPhone, I finally entered the correct Password and got past the Windows 10 login screen. In resetting your PIN, DO NOT CANCEL the process.
Even though this post is about resetting your PIN, you should create a Password Reset Disk to avoid the above nightmare.
Windows has a built-in application called Forgotten Password Wizard. This Password recovery tool is what you would use to create your Password reset disk.
This is for Windows 10 devices. To follow this blog post, you will need your Microsoft account Password and Windows 10 login Password.
Creating a Password Reset Disk
In the Cortona search box, type in Control Panel
Open the Control Panel
Click User Accounts
Click User Accounts. Refer to below image:
The Settings User Accounts screen
Insert a flash drive
Click the link Create a password reset disk. This will open the Forgotten Password Wizard. See below image:
Starting the Forgotten Password Wizard
To start, click Next. The wizard will walk you through the process. You will be asked to select the flash drive from a drop down menu where you want to store the reset disk. Click Next to proceed.
Then you will be asked to enter your current Windows Password. Enter your Password and click Next. See following image:
Entering your current Windows Password
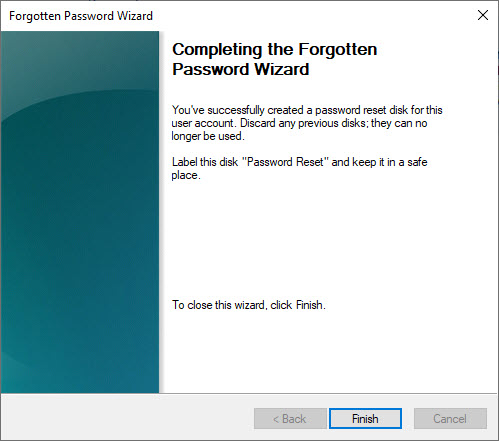
You will be presented with a progress bar; once it reaches 100%, click Next, then click Finish. Refer to below image:
Finishing the Forgotten Password Wizard
At this point, you can check for a file called userkey.psw on your designated flash drive. See below image:
Locating your new Password Reset file
You can now remove the flash drive, label it and store in a safe place.
Using the Password Reset Disk
The next time you are locked out of your PC, plug in your USB flash drive and click Reset Password link. You may have to attempt your login a few times before you see the link. Select your disk from the drop down menu and click Next. You will be prompted to type your new Password and a Password hint. When you are done, click Finish.
You should now be able to sign into Windows with your new Password.
Reseting Your Windows 10 PIN When Not Signed In
This assumes you already have a PIN for your Windows 10 login. If not, refer to the section below about adding a PIN. Its best to change your PIN while you are logged on. If you are locked out of your PC and you have a PIN, you should see I Forgot My PIN link on the login screen. If so, click the link. You will be asked to enter your Microsoft account Password and how to send a new code. Once you have the code, input it and click Verify. Enter your new PIN twice and now you can use the new PIN when logging into your device.
Resetting Your Windows 10 PIN When Signed In
Click the Start button
Click the Settings tile (the one with the gear icon)
Click Accounts
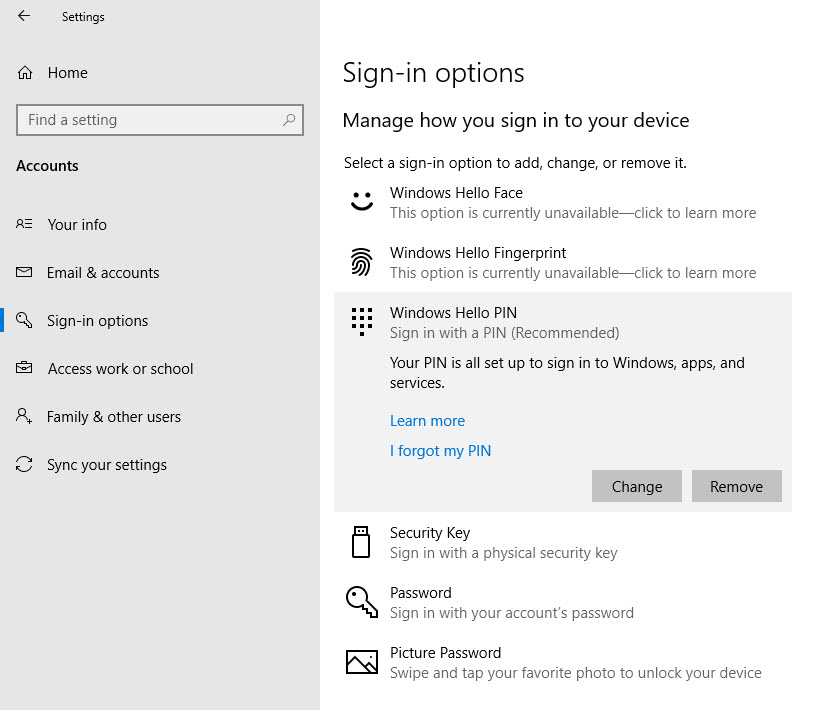
Click Sign-in options. Refer to below screen:
The User Accounts sign=in options screen
Click Windows Hello PIN. See following image:
The Windows Hello PIN screen
Click I forgot my PIN link
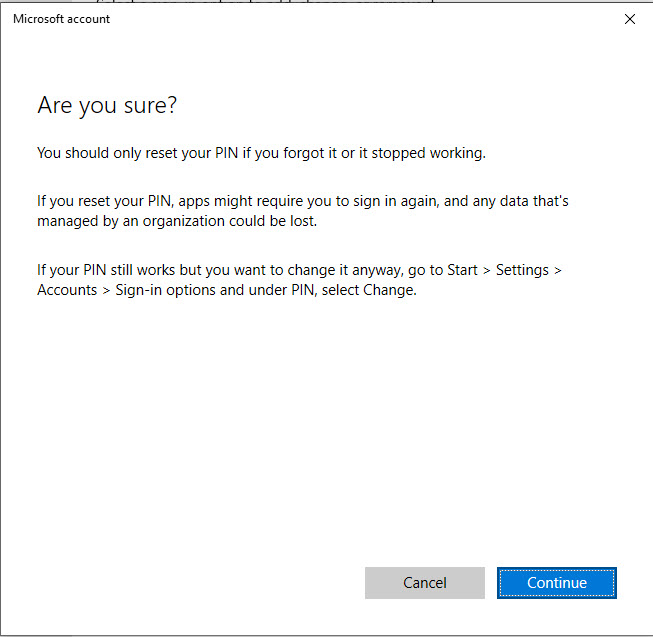
You will be presented with an Are You Sure screen. Please read the info about resetting you PIN. If you are sure about doing this, click Continue. Refer to following image:
Are you sure you want to do this screen
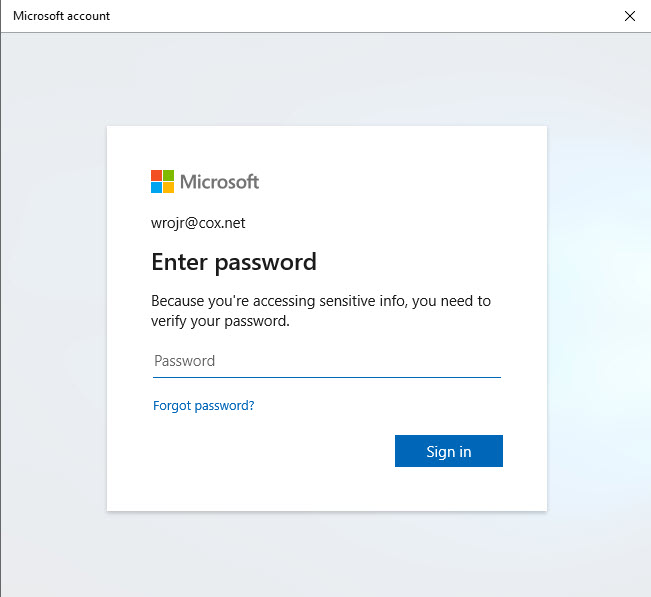
At this point, DO NOT CANCEL the process. Next, you will be asked to enter your Microsoft account Password. Enter your Password and click Sign in. See following image:
Entering your Microsoft account Password
Now you will be asked to enter your new PIN twice. then click OK. Refer to below image:
Verifying your new PIN
You now have successfully changed your PIN. Simply use it the next time you login into Windows 10 on your device.
Adding a Windows 10 PIN When Signed In
Remember my nightmare story about losing my PIN. I finally got back into Windows through my Password. Adding a PIN is similar to resetting your PIN while signed in. Follow the steps preceeding the first screenshot above, then:
Click Windows Hello PIN. See following image:
The Windows Hello Pin screen
Click the Add button
Enter your Windows 10 login Password and click OK. Refer to below image:
Entering your Windows Password
Now you will be asked to enter your new PIN twice. then click OK. See following image:
Verify your new PIN
You now have successfully added a PIN. Simply use it the next time you login into Windows 10 on your device.
I Would Like to Hear from You
Please feel free to leave a comment. I would love hearing from you. Do you have a computer or smart device tech question? I will do my best to answer your inquiry. Please mention the device, app and version that you are using. To help us out, you can send screenshots of your data related to your question.
The author’s Vietnam eBook on the Battle for Tra Bong: Events and Aftermath
In Microsoft Excel, you can add a watermark, sort of, to an Excel sheet. How to do this is not intuitive. In Microsoft Word you have templates to chose from such as “Confidential” or “Do Not Copy” for a watermark.
I am going to discuss one method; adding an image background as a watermark. We are going to insert an image which could be a photo or a company logo. Let’s see how to implement this watermark.
This is for Excel for Office 365 Windows and Mac versions. Other versions of Excel will be similar.
Your Excel Sheet
Create an Excel spreadsheet or use an existing one. Refer to my newly created sheet (Sheet1) below:
My Excel sheet
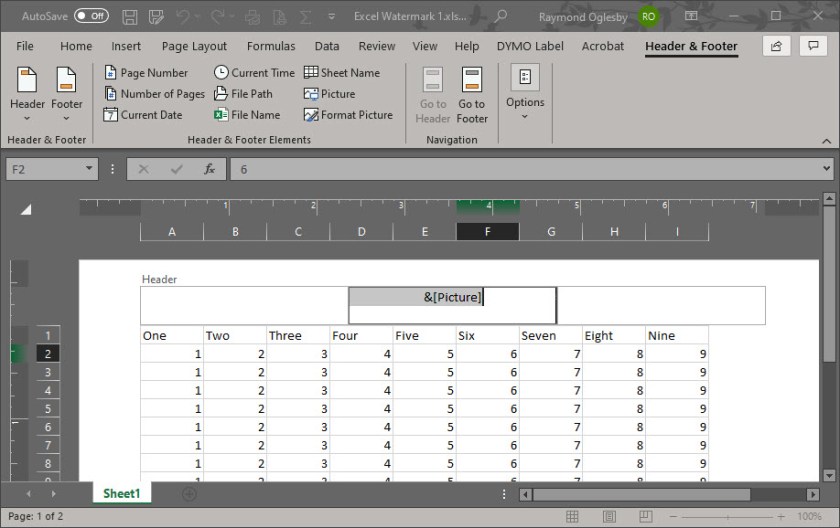
Click Insert>Text>Header & Footer
Inserting a Header in the middle column
Select Picture
Select Your Watermark
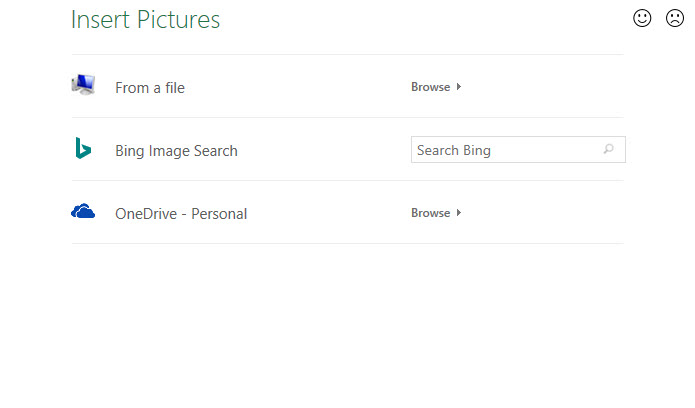
Select your option for inserting a picture. Refer to following screenshot
Options for selecting a watermark image
Select your image
Click Insert
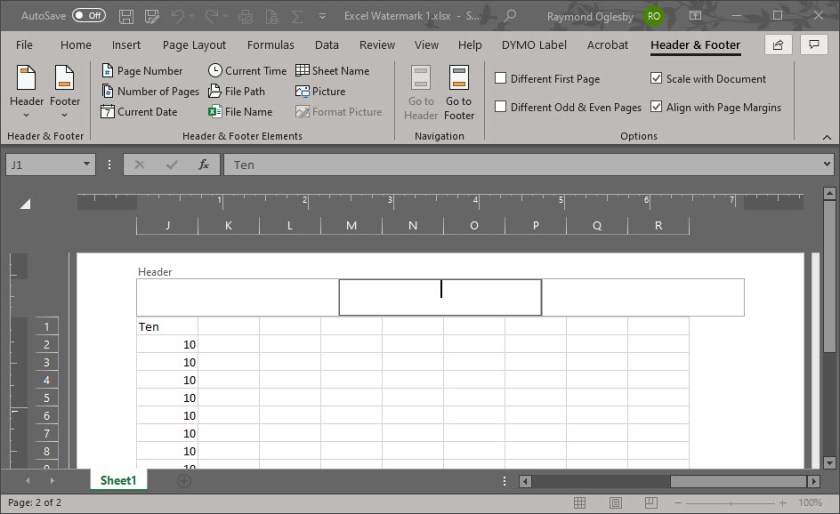
You will see &[Picture] in the Header.
Your Header screen without the watermark being shown
View Your Watermark
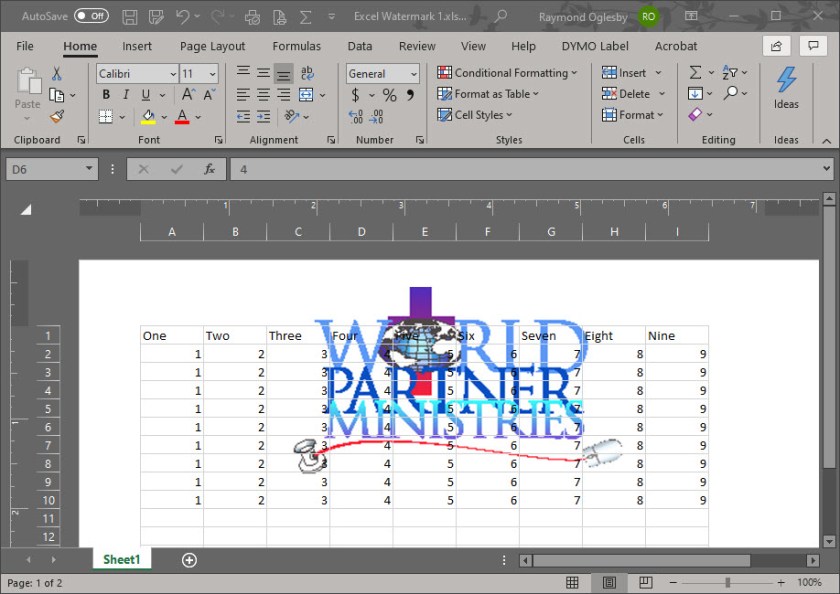
Tap anywhere outside the Header to see your watermark. Refer to following screenshot for my selection of a logo:
My Excel sheet with a logo as a watermark
Formatting Your Watermark
To format the image:
Tap anywhere outside the Header
Click Insert>Text>Header & Footer
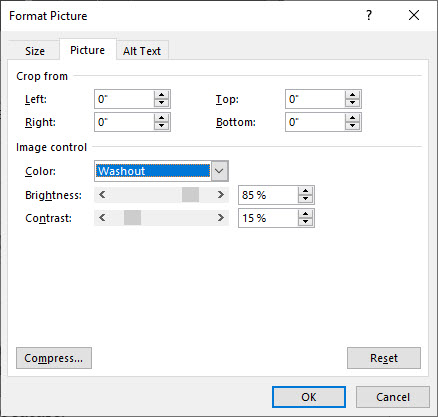
Select Format Picture. You will see the following screen:
Resize your watermark
From here you can resize the image
Click the Picture tab
Select the Color box and change it to the Washout option
Click OK. This allows the background image to be less intrusive.
Using the Washout option
Refer below to my final capture of the watermark screen:
My final screen with the watermark background dimmed in order to see the cells contents
Save your spreadsheet and close or exit Excel
For a Microsoft Word look-a-like watermark, use the WordArt feature in Excel.
I Would Like to Hear from You
Please feel free to leave a comment. I would love hearing from you. Do you have a computer or smart device tech question? I will do my best to answer your inquiry. Please mention the device, app and version that you are using. To help me out, you can send screenshots of your data related to your question.
The author’s Vietnam eBook on the Battle for Tra Bong: Events and Aftermath
In this Coronavirus pandemic, many people are working from home. Our local TV news and weather people have live audio and video streaming from their homes for the daily news broadcast. Working from home has become the new norm.
This will continue after the crisis is over. Instead of going to an office or to a clients location, you will collaborate through an audio and video service.
I researched some web sites for the top call services. They have a similar mix of apps, just in a different order. Some of the web sites have organizations I never heard of. So, I like the ranking from Office Watch. Click here to read their review.
This is for modern web browsers and apps on Apple, Android and Microsoft platforms
Their top seven online call services are as follows:
FaceTime – handles up to 32 people
Skype – up to 50 people
WhatsApp – handles 4 people
Signal – one-on-one calls only
Zoom and Meetings – up to 100 people for the free version; 1000 for their enterprise paid version
Microsoft Teams and Live Events – can handle 4 participates, up to 10,000 for the paid version
Google Hangouts – up to 150 people
I recommend Facetime or Skype for a small busines; Zoom for a medium business; and Zoom Meetings for a large enterprise. Facetime and basic Zoom are free. Click here to read the review of their rankings.
I Would Like to Hear From You
Please feel free to leave a comment. I would love hearing from you. Do you have a computer or smart device tech question? I will do my best to answer your inquiry. Please mention the device, app and version that you are using. To help us out, you can send screenshots of your data related to your question.
The author’s Vietnam eBook on the Battle for Tra Bong: Events and Aftermath
Sounds Almighty? God Mode is a special option long available in Windows that gives you quick access to most of the applets and commands from Control Panel. As such, God Mode is a useful time-saver that can spare you from having to hunt through different windows and screens to find the Control Panel command you want.
Since Microsoft no longer offers a convenient shortcut for Control Panel in Windows 10, God Mode can be a fast and easy way to access all of its core commands.
First, lets make sure you’re signed in to your Windows 10 computer with an account that has administrative privileges. By default, your own account should have the necessary rights.
This is for Windows 10 operating system
Checking Administrator Rights
To double-check:
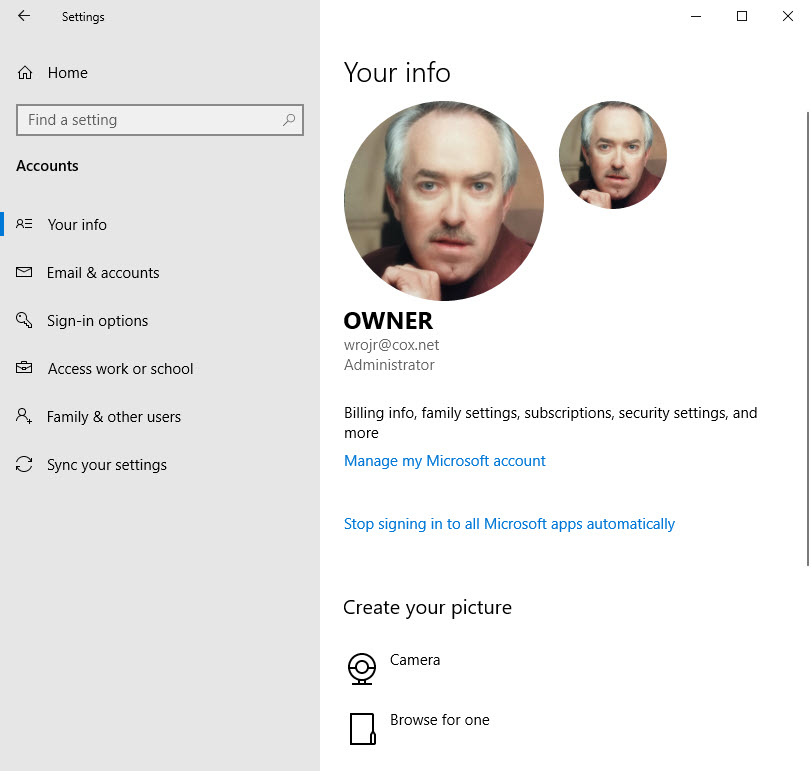
Type Settings in the Cortana search bar
Click on Settings at the top of screen
Select Accounts
Select Your Info to make sure your account is designated as Administrator. See the below example:
Administrator rights
Setup Folder Shortcut
Right click on an empty area of your Desktop/Laptop
Select New
Select Folder
Right click on the New folder and rename it to “GodMode.{ED7BA470-8E54-465E-825C-99712043E01C}” without the quotes. Its best to copy and past this key into the Rename field. Note! There is a period after the word GodMode. See below image for an example:
God Mode folder name
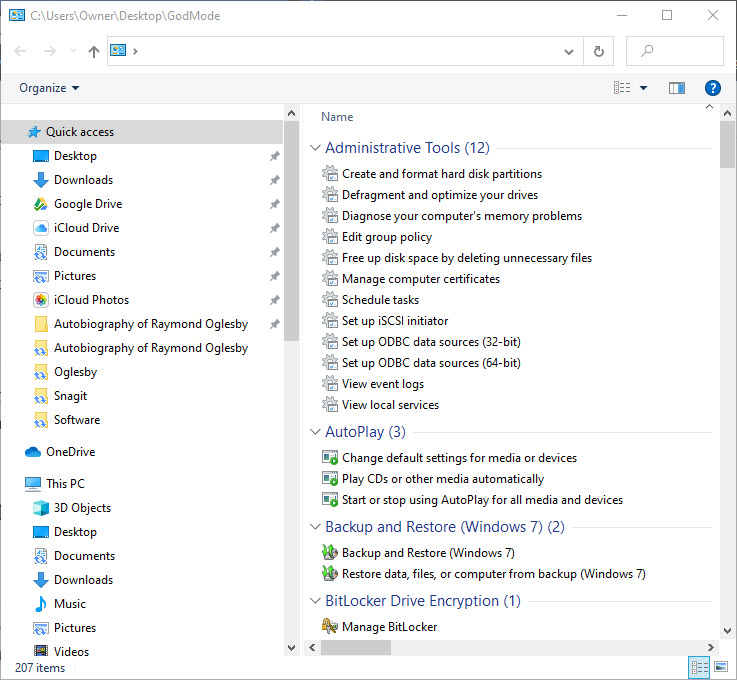
Click or double click the icon to run
A window will open with all the accessible commands. The commands are organized by the Control Panel applet. You will see such commands as Administrative Tools, AutoPlay, Backup and Restore, and many more. See below screenshot for an example:
God Mode results
Some Tips
You can also Search for keywords using the Search box. Once you have located a command, double click to launch it. If you accidentally click the “X”next to the Search box, the Search will no longer be available.
Its best to leave the icon on the desktop. If you try to rename it, the God Mode may no longer work, especially in Windows 10.
You can click the More options drop down box to present a different view of the listing. In the following example, I have chosen to list the commands with a small icon in front of the command description.
Displaying God Mode with small icons
I Would Like to Hear from You
Please feel free to leave a comment. I would love hearing from you. Do you have a computer or smart device tech question? I will do my best to answer your inquiry. Please mention the device, app and version that you are using. To help us out, you can send screenshots of your data related to your question.
The author’s Vietnam eBook on the Battle for Tra Bong: Events and Aftermath
Do you need to give people credit for your PowerPoint presentation? If so, you can add these credits to your final slide by using the scrolling text animation feature. You can use an existing presentation or add this to your next one. In our example, we are using an existing PowerPoint slide show.
This is for PowerPoint for Office 365 Windows and Mac versions. Other versions of PowerPoint will be similar.
Setting Up the Slide
Open an existing presentation or create a new one
Navigate to the final slide
Click the Insert tab
Insert a blank text box by clicking the Text Box icon in the Text group. Your cursor will turn into an down arrow. After you click, the cursor changes to a crossbar. Click and drag the cursor to draw the text box. See followin image:
PowerPoint drawing the text box for the Credits
Entering Your Presentation Credits
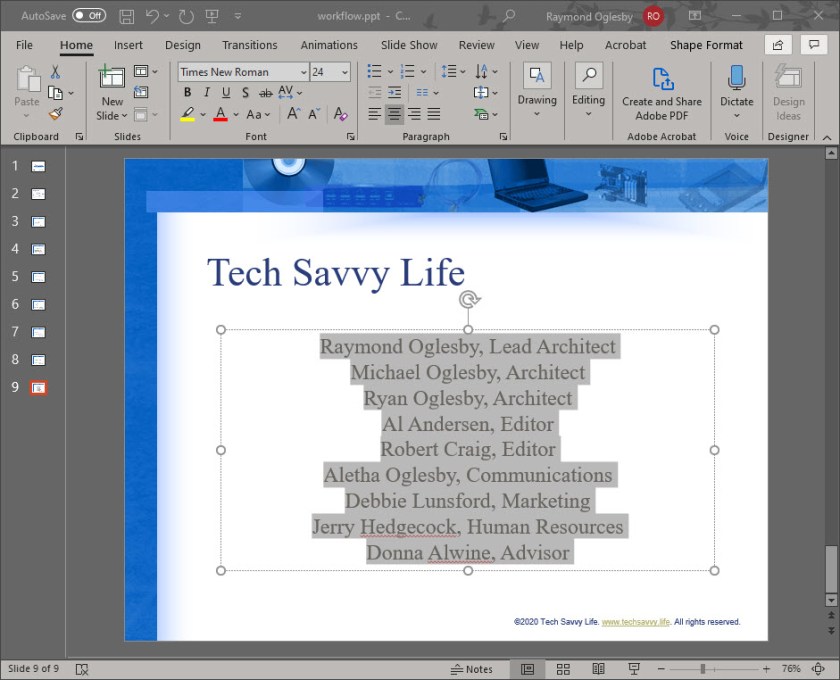
Enter your credits. The text box will expand, if necessary, as you enter the names.
Highlight your entries
Select the Home tab
Since credits are usually centered, select the Center alignment icon in the Paragraph group. See following screen:
PowerPoint Credits completed and centered
Adding the Animation Effects
Now lets add the animation to the text box. With the textbox selected:
Click the Animations tab
Select Add Animation button in the Advanced Animation group. See following image:
PowerPoint about to add the animations
A drop down menu will appear. Scroll to the bottom and select More Entrance effects. The Add Entrance Effect window will be shown. See following image:
PowerPoint Add Entrance Effect drop down menu
Setting the Credits Animation
Scroll down to the Exciting group and select Credits. You will see the credits animation scrolling effect in the background.
Click OK to save your changes
PowerPoint selecting the Credits animation
The rolling credits will be added to your presentation. You may now view your slideshow from the beginning or from the current slide to see the Rolling Credits in action.
Thats it. You are finished.
I Would Like to Hear from You
Please feel free to leave a comment. I would love hearing from you. Do you have a computer or smart device tech question? I will do my best to answer your inquiry. Please mention the device, app and version that you are using. To help us out, you can send screenshots of your data related to your question.
The author’s Vietnam eBook on the Battle for Tra Bong: Events and Aftermath