How to Use the Dim Feature in Microsoft PowerPoint

I ran across this neat feature of Microsoft PowerPoint that I want to share with you. As a presenter, you are in control of what is being displayed. Instead of presenting all your bullet points at once lets dim there appearance one at a time. The “dim text” feature allows the audience to focus on one topic. For my example I am using a single slide with five bullet points.

Here is a link to a demo presentation on using the Dim feature as presented in slide 3. I am using a presentation available from TechRepublic.

This is for PowerPoint for Office 365 Windows and Mac versions. Other versions of PowerPoint will be similar.

Launch PowerPoint

  • Open PowerPoint on your Desktop/Laptop or Mac
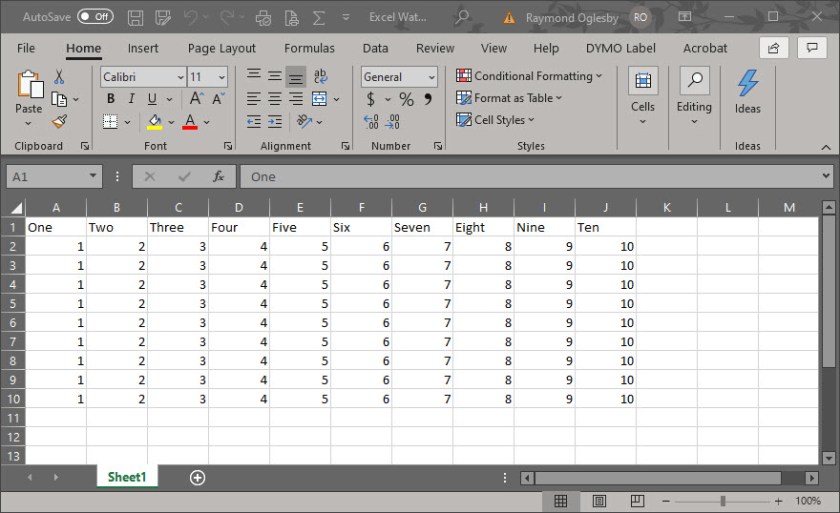
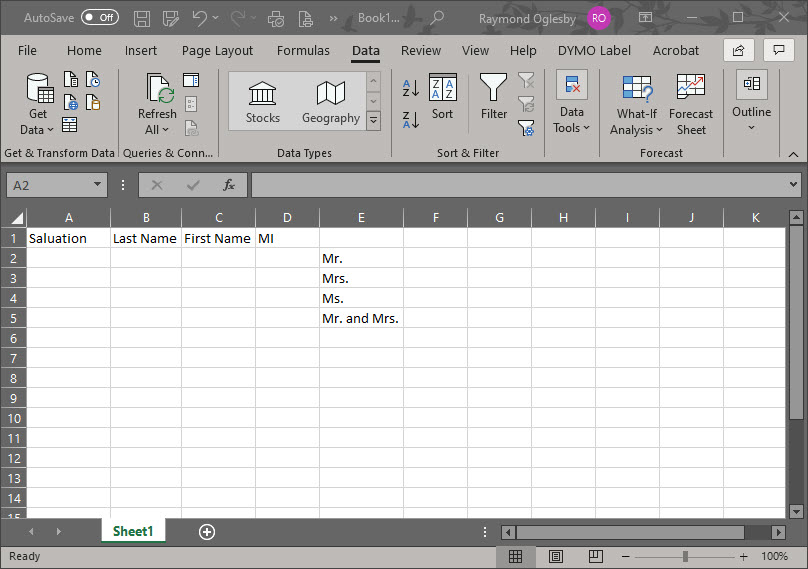
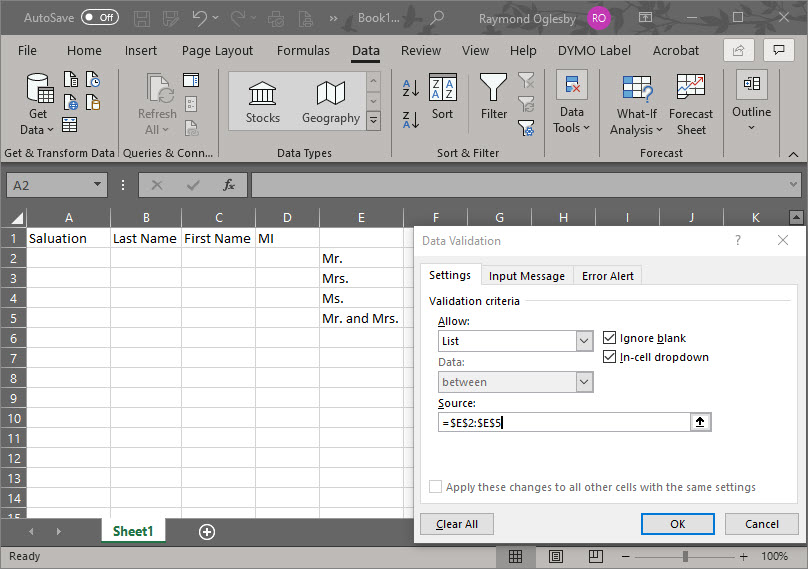
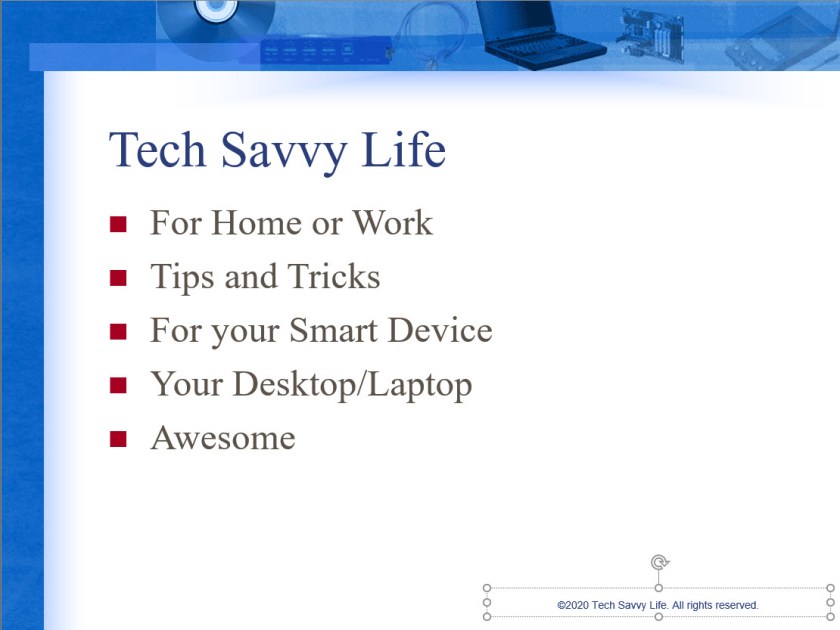
  • Find a slide that contains bullet points or text you want to dim. See my example below:
PowerPoint Slide 1
PowerPoint Slide Bullet Points screen
  • Highlight a bullet point or text
  • Select the Animations tab and choose the Appear animation

Set Animations

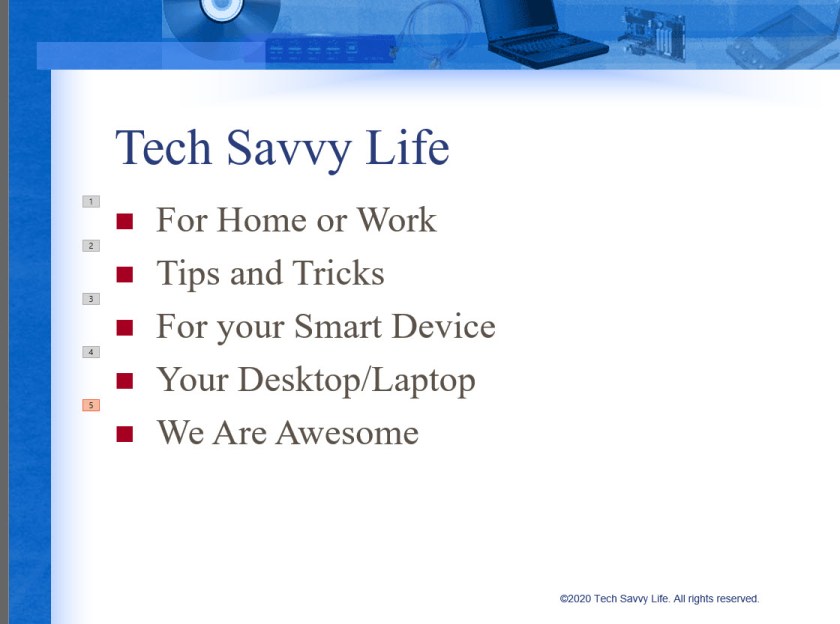
The animation will be successfully applied if you see a number next to the bullet point or slide.

Repeat the above steps until you have applied an animation to each bullet point or text. Refer to the following image:

PowerPoint Slide 2
PowerPoint Slide with Animation applied screen
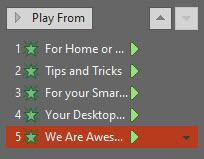
  • Select all the Animations by using the “Ctrl” key and clicking on each animation.
  • Select the arrow next to the right side of the animation
PowerPoint Slide 3
PowerPoint Animations screen

Set Effects

Select Effect Options. See following image:

PowerPoint Slide 4
PowerPoint Effects screen

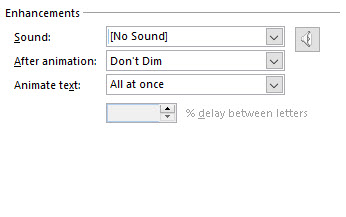
Change Behavior for Dimming

We are going to change the behavior of the default Don’t Dim option by clicking the arrow next to the item (a drop down box selection) and select a color slightly different than your bullet points or text. You want your color selected to be visible to the audience. For my example, I selected a light red color:

PowerPoint Slide 6
PowerPoint Color Selection for Animation screen
  • Click OK

Test Your Slide

Now its time to test out your slide. You should see something like the following screen as you manually or automatically select each bullet point.

PowerPoint Slide 7
PowerPoint using the Dim Feature

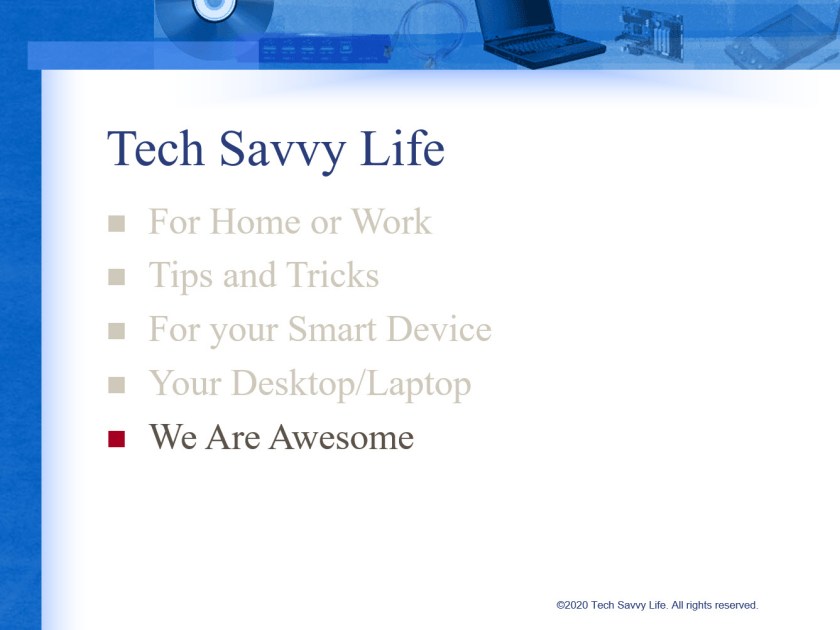
This is a nifty feature for your next text presentation. Save your slide or presentation, you are finished.

I Would Like to Hear from You

Please feel free to leave a comment. I would love hearing from you. Do you have a computer tech question? I will do my best to answer your inquiry. Please mention the app and version that you are using. To help me out, you can send screenshots of your data related to your question.


How to Protect an Excel Workbook, a Sheet and its Structure

Do you want to protect your Microsoft Excel workbook or a sheet in your workbook? If so, this blog post is for you. We are going to password protect a workbook, protect a sheet in a workbook and the Excel file itself.

This is for Excel for Office 365 Windows and Mac versions. Other versions of Excel will be similar.

Protect a Workbook

I recommend you start with a blank Excel workbook, just in case you forget a password. To assign a password to an Excel workbook, do the following:

  • Open a blank Excel workbook. For demonstration purposes, I am using an Excel workbook that contains one sheet with cell data. You can choose an existing Excel workbook if you chose. See my workbook below :
Excel Security 1
  • Select File>Save As
Excel Security 2
  • Select More options (underneath Excel Workbook drop down box)
Excel Security 3
  • Select the Tools drop down box
  • Chose General Options
Excel Security 4

Set the Password(s)

You will see notice two password boxes, one to open the workbook and one to modify the workbook

  • Enter one or both passwords. Make sure you write down these passwords and store them in a safe place.

You have two other options to set if you chose, Always create backup and Enable Read-only recommended. The first is self explanatory. The second option is an extra layer of protection by enabling the workbook to read-only status upon opening.

  • Confirm your password(s) by reentering the password(s)
  • Click OK
  • Click Save
  • Close or Exit Excel

Note! A user who doesn’t know the second password can open and view the data by clicking the Read Only option. This user can still modify the data, but they are unable to save their changes to the protected workbook. However, the user can save the workbook under a new name, which circumvents the protection process. Of course, password-cracking software will get you into the workbook.

Protect a Sheet

  • Open a blank Excel workbook. For demonstration purposes, I am using an Excel workbook that contains one sheet with cell data. You can choose an existing Excel workbook if you chose.
  • Select the Review tab
  • Click the Protect icon
  • Click Protect Sheet icon. Refer to following image:
Excel Security 5
  • Enter your password in the Password to unprotect sheet box
  • Click OK
  • In the Confirm Password dialog box, type the password again
  • Click OK
  • Save your changes
  • Close or Exit Excel

Tip! To remove a password, click Protect>Unprotect Sheet and enter your password. You can also select Protect Workbook icon to protect a workbook which follows.

Protect Excel Structure

  • Open a blank Excel workbook. For demonstration purposes, I am using an Excel workbook that contains one sheet with cell data. You can choose an existing Excel workbook if you chose.
  • Select the Review tab
  • Click the Protect icon
  • Click Protect Workbook icon. Refer to the following image:
Excel Security 6

Select the Windows option if you want to prevent users from moving, resizing, or closing the workbook window or hide/unhide windows

  • Enter your password
  • Click OK
  • In the Confirm Password dialog box, type the password again
  • Click OK
  • Save your changes
  • Close or Exit Excel

Protect the Excel File

To prevent users from accessing the data in your Excel file, we are going to protect the file with a password

  • Open a blank Excel workbook. For demonstration purposes, I am using an Excel workbook that contains one sheet with cell data. You can choose an existing Excel workbook if you chose.
  • Select File>Info. Refer to my image below:
Excel Security 7
  • Click Protect Workbook icon
  • Chose Encrypt with Password option
Excel Security 8
  • Enter a password in the Encrypt Document dialog box
  • Click OK
  • In the Confirm Password dialog box, type the password again
  • Save your changes
  • Close or Exit Excel

Be cautious when sharing files or passwords with other users. You still run the risk of passwords falling into the hands of unintended users. Remember to write down your passwords and store them in a safe place.

I Would Like to Hear from You

Please feel free to leave a comment. I would love hearing from you. Do you have a computer tech question? I will do my best to answer your inquiry. Please mention the app and version that you are using. To help me out, you can send screenshots of your data related to your question.

PC Fine Tuning Summary

You can “pull on that drawer” like the above image to get your PC in shape or follow this blog post.

I have discussed various programs on fine tuning your PC in previous posts. This is a summary post of those programs, all in one place. I have done this fine tuning on many kinds of machines and operating systems in 15 countries as well as the USA. All these programs are free or available on a trial basis.

Some friends of mine had rather take their PC to a geek shop for a reformat of their hard drive and a fresh copy of Microsoft Windows every six months. They spend hundreds of dollars in doing this, which is unnecessary.

You have a choice of following the steps below or paying a consultant (like myself) or paying a geek shop to fine tune your PC. But its not hard to do it on your own. It takes one to three hours about every three to six months. If you haven’t already done so, you will need to download and install the following programs. You only have to do this once, then just run the programs. The links provided below walk you through downloading, installing and running these applications.

This is for a Windows based operating systems

Download and Install Applications

  • DriverMax (paid or trial version) or a similar free program like Driver Booster
  • Belarc Advisor
  • Autoruns
  • CCleaner
  • Wise Disk Cleaner
  • Wise Registry Cleaner
  • Defraggler

Lets get started.

I recommend doing the following steps in order:

Running the Applications

  1. Create a Restore Point and a backup of the Registry using Wise Registry Cleaner
  2. Uninstall applications not being used through the Apps and Features. In the Cortana search box. type “Uninstall Programs” (without the quotes) to load the feature to uninstall your unneeded programs
  3. Check your device driver updates using DriverMax (paid or trial program) or a similar free program like Driver Booster
  4. Run Belarc Advisor for a status of your PC, especially for anti virus software definitions and missing Windows Updates and apply updates as necessary
  5. Check your startup applications and missing entries using Autoruns
  6. Delete junk files using CCleaner and/or Wise Disk Cleaner. Its best to run both
  7. Clean your registry using Wise Registry Cleaner
  8. Defragment your hard drive(s) using Defraggler
  9. Reboot or restart your PC

That’s it. Your PC will now run faster and be more stable!

I Would Like to Hear from You

Please feel free to leave a comment. I would love hearing from you. Do you have a computer tech question? I will do my best to answer your inquiry. Please mention the app and version that you are using. To help me out, you can send screenshots of your data related to your question.

Related

Update your drivers using a program like DriverMax

Determine the status of your machine using Belarc Advisor

Turn off missing files using Autoruns

Delete junk file using CCleaner

A more robust file cleanup using Wise Disk Cleaner

Clean the Registry of invalid entries using Wise Registry Cleaner

Defragment your hard drive(s) and partitions using Defraggler

How to Transfer iPhone Contacts to Windows 10

Have you ever wanted to share your iPhone contacts with your Windows 10 PC? I have wanted to do this for a year. It used to work but my PC went “south” last year. I finally did some research and came up with this post for you to implement. You can share your smart device contacts through Apple’s iCloud service. To use this service, your contacts must be synced with iCloud. So, lets get started.

This is for iPhone or iPad and Windows 10 operating system

  • Open the Settings app on your iPhone. Its usually located on your home screen. Your screen should look similar to the following image:
Win 10 Contacts Settings
My iPhone home screen
  • Tap your name at the top of the screen. See following screenshot:
Win 10 Contacts Profile
My iPhone Settings screen

Syncing Contacts

  • Tap iCloud
  • Verify that your Contacts is being synced. Either the toggle switch will be green or you will see iCloud storage being used like the below image. If not, tap the toggle button to enable the process and sync your contacts.
Win 10 Contacts Storage
My iPhone iCloud Storage screen
  • On your Windows 10 PC, log in to iCloud website with your Apple ID and Password
  • Click on the Contacts applet. See following screenshot:
Win 10 iCloud Contacts
iCloud applets on Windows 10 PC screen

Selecting/Exporting Contacts

  • Select a Contact from your list. See the following image for my selection of Chris Dow:
Win 10 iCloud Selection
iCloud Contacts screen
  • Click the small gear icon at the bottom left corner
  • Select Export vCard. Refer to following screenshot:
Win 10 iCloud Export
Selecting and Exporting an iCloud Contact screen

You can select more than one contact by selecting a single name and using the “Shift” key to select the last contact. There is an option to Create Group at the bottom right for your multiple contact selection.

Note! It is best to export just one contact. Although you can select multiple contacts, only one contact data (the first one selected) is exported, especially for Outlook.

By default, the exported VCF file is placed in your PC Downloads folder.

  • Open your File Explore and find the VCF file. Refer to following image:
Win 10 iCloud Downloads
File Explorer Downloads folder screen with Chris Dow VCF file

Using Your VCF File

  • Right click on the VCF file and select Open
  • Select where you want to install your contact(s). You have several choices, like Outlook, the People app and Windows Contacts
  • Select your choice and click OK

Your choice will open for your review.

  • For Outlook, click the Save & Close option to complete the export. See following screen::
Win 10 iCloud Outlook
Exported VCF file from iCloud to Microsoft Outlook in Windows 10 screen

That’s it. You are done.

Enable iCloud Contacts Sharing

BUT WAIT, I want to share all my Contacts via iCloud to my Windows 10 PC, not just a few. You can use iCloud for Windows to synchronize your contacts and other data between your iOS device and Outlook. Lets get started.

This works with the following variations of Outlook:

Outlook for Office 365, Outlook 2019, Outlook 2016, Outlook 2013 and Outlook 2010

  • Download and install iCloud for Windows.
  • After installation, launch the iCloud app and sign in with your Apple ID and Password. Your screen should look like the below image:
Win 10 Outlook iCloud Screen
iCloud for Windows screenshot
  • Select the option to sync Mail, Contacts, Calendars, and Tasks. You can select other options to sync from this screen.
  • Click Apply
  • Click Close

Once the setup has finished, launch Outlook. Your iCloud email, contacts and calendars should now be synchronizing with Outlook.

  • To verify, in Outlook, open a new email. In the Address Book drop down box, select iCloud like the image below:
Win 10 Outlook iCloud Names
Windows 10 iCloud contacts screen
  • You should see ALL your iCloud contacts
  • Close Outlook

If you are experiencing problems please click here for Apple help.

I Would Like to Hear from You

Please feel free to leave a comment. I would love hearing from you. Do you have a computer tech question? I will do my best to answer your inquiry. Please mention the app and version that you are using. To help me out, you can send screenshots of your data related to your question.

How to Create a Microsoft Excel Drop Down List

Drop down lists are used to select specific data, in our example, a list of Salutations. If the user tries to enter a Salutation that is not in the list, Excel rejects the entry.

I am using a simple drop down list in an Excel sheet. This feature is not well known nor initiative.

Salutations was a BIG DEAL for a religious organization that I worked for as a Consultant. The company had a donor base of 25,000+ names/addresses. (Of course, I was using a database, not Excel, to manage the data.) If the Salutation was incorrect on a donor letter, some donors refused to give monies for the company projects. For example, do you address them as Mr. and Mrs. or Dr. and Mrs. or Mr. and Dr.? Some donors wanted no Salutation. I spent a lot time getting the Salutations correct.

This is for Excel for Office 365 Windows and Mac versions. Other versions of Excel will be similar.

Setting Up the Excel Sheet

  • Enter the headings in Row 1 (Optional)
  • Create a list of cells E2:E5. Alternatively, you could put the list in another sheet.
  • Select the empty cell A2. (You can position the drop down list in most any cell or even multiple cells.)
Excel Drop Down List Setup
Setting up Excel for a drop down list

Using Data Validation

  • Select the Data tab
  • Select Data Validation
  • Choose List from the Allow options drop down list
  • Click the Source control and drag to highlight cells E2:E5. Alternatively, you could enter the cell reference $E$2:$E$5 or use a sheet and cell reference if your list is in another sheet.
  • Ensure that the In Cell dropdown option is checked. If you leave this unchecked, Excel forces users to enter only the list values, but it won’t present a drop down list. The users would have to guess the values; not a good idea!

See the following screenshot:

Excel Drop Down List Source
Entering the Allow and Source option
  • Click OK

You can add the drop down list to multiple cells. Select the range of data input cells instead of a single cell. Also, you can select noncontinuous cells by holding down the Shift key while you click the appropriate cells.

You can copy and paste this drop down cell to any other cells in your sheet.

Below is a screenshot where Mr. was selected as a Salutation for cell A2:

Excel Drop Down List Selected
Excel drop down list selection

I Would Like to Hear from You

Please feel free to leave a comment. I would love hearing from you. Do you have a computer tech question? I will do my best to answer your inquiry. Please mention the app and version that you are using. To help me out, you can send screenshots of your data related to your question.

How to Use the Autoruns Program

Autoruns Results
Screenshot of Autoruns under Everything Tab

This is the third post in a series on “cleaning” your machine. The instructions are for a PC using the free program Autoruns from Sysinternals.

This is for Windows based operating systems

Before following this post, refer to the previous posts on Delete Junk Files and Defrag Hard Drive(s) and Partitions.

Introduction:

This utility, which has the most comprehensive knowledge of auto-starting locations, shows you what programs are configured to run during system bootup or login, and when you start various built-in Windows applications like Internet Explorer, Explorer and media players. These programs and drivers include ones in your startup folder, Run, RunOnce, and other Registry keys. Autoruns reports Explorer shell extensions, toolbars, browser helper objects, Winlogon notifications, auto-start services, and much more. Autoruns goes way beyond other autostart utilities.

By default Autoruns starts by the Hide Signed Microsoft Entries option which helps you to zoom in on third-party auto-starting programs. Also, by default, the option to Hide Empty Locations is turned on. I recommend keeping these options.

You’ll probably be surprised at how many programs are launched automatically!

Running Autoruns:

  • Close all running programs
  • Empty your Recycle Bin
  • Click the following for Autoruns for Windows. We are going to just run the program instead of installing. If you want to install, click the download link at the top of the page and follow its instructions..
  • Click the Run Now from Sysinternals Live. Its located at the top underneath the download link. The autoruns.exe file should appear at the bottom of your screen.
  • Click on the file to run

The program has several options in the main menu to include File, Entry, Options and Help that you can explore. For our purposes, you want to know what entries cannot be found. To do this:

  • Click on each tab, like Logon, and look for any entry highlighted in yellow as shown in the image at the top of this post. At the end of the entry, the program will say “File Not Found”. Uncheck the box at the beginning of the entry. This lets Autoruns bypass this entry, in our case, on Logon. The Logon tab is the most important as it depicts what programs are loaded when you start your PC. If you want to stop a program on startup, just uncheck the box for the entry.
  • Do this for every tab at the top of the screen as shown below:
Autoruns Results
My screenshot for Logon Tab

When you uncheck a yellow highlighted entry, you may get the following popup dialog box:

If so, click on Run as Administrator and the program will restart giving you Admin privileges. Now you are able to uncheck the “File Not Found” entry(s).

Do this for every tab at the top of the program

Close Autoruns and any other running programs and reboot your PC.

I Would Like to Hear from You

Please feel free to leave a comment. I would love hearing from you. Do you have a computer tech question? I will do my best to answer your inquiry. Please mention the app and version that you are using. To help me out, you can send screenshots of your data related to your question.

Related:

Delete Junk Files
Defrag Hard Drive(s) and Partitions

Introduce Yourself

I am Raymond Oglesby with 30 years in Information Technology (IT). I have taught Microsoft Applications and troubleshot computers in 15 countries as well as many States. Half of my IT career has been on mainframe computing in a dozen computer languages; the other half in the Personal Computer (PC) client server environment.

I am starting my first blog on using technology at home or work. I plan on updating the blog twice a week. Stay tuned and hope you enjoy my blog.

Please feel free to leave a comment. I would love hearing from you. Do you have a computer tech question? I will do my best to answer your inquiry. Please mention the app and version that you are using. To help me out, you can send screenshots of your data related to your question.