The Files app got a huge upgrade with iOS 13 and iPadOS 13 and its support for external storage. One of the new things was the native support for Zip files. You’ll no longer need to download third-party apps and shuffle between different apps just to open a Zip file.
Note! The naming convention of zip or compressed, and unzip or uncompressed, are interchangeable. Your original files are left unchanged.
The main reason for compressing your photos or documents is to reduce the file size to send as an email attachment. Without the Zip capability, the file could be too large for emailing.
This is for iPhone/iPad running iOS 13 or higher

Creating a Zip File
To compress files, you’ll first need to add them to the Files app. You can do this easily using the Share sheet feature.
In this example, we’ll walk you through the process of ziping and unziping photos from the Photos app, but it will work using any other type of document.
Note! Your original photos or documents are left unchanged. They are just being compressed to a different location.
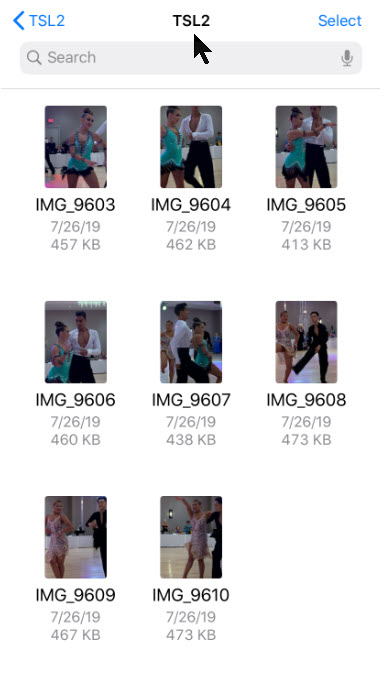
Open the Photos app and navigate to the album containing your photos. From there, tap on the Select button in upper right hand corner and select the Photos you want to compress by tapping on them. Refer to below image:

Next, tap the Share button in lower left hand corner. See below image:

From the Share sheet, tap on the Save to Files option. See following image:

Choose the On My iPhone or On My iPad option. Refer to below image:

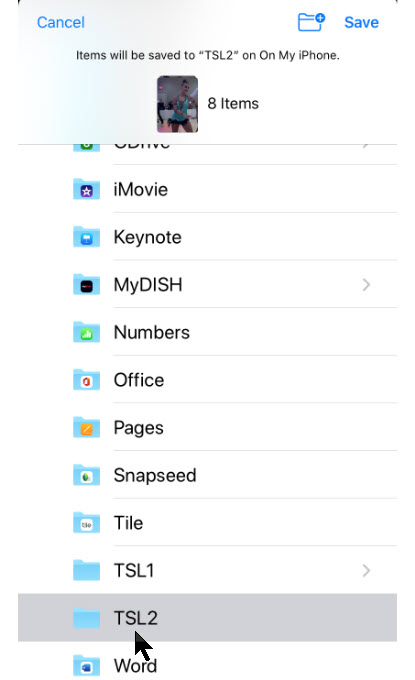
Here you can select an existing folder or create a new one, then tap the Save option. You will see a message at top of the screen displaying number of items, the folder name and On My iPhone or On My iPad location. See below image:
Accessing the Files App
Navigate to the Files app and open the folder or location where you saved the photos. Then tap the Select button and select all the photos. Next, tap on the hamburger icon (the one with 3 dots) in lower right hand corner. Refer to below image:

In the context pop-up menu, tap on the Compress button. See below image:

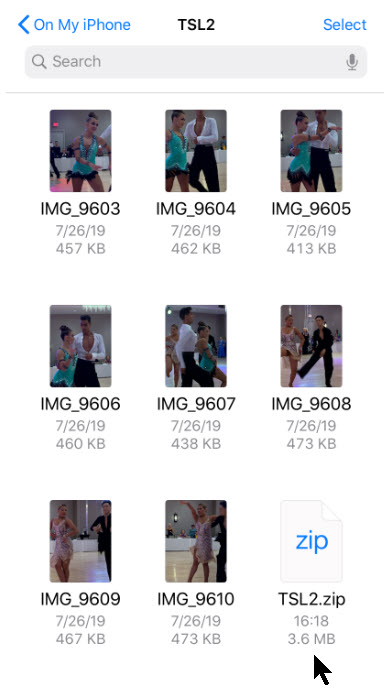
You will see a new file labeled Archive.zip in the same folder. Refer to below image:

Renaming the Zip File
To rename the Zip file, tap and hold on it until the see its Context pop-up menu. See below image:
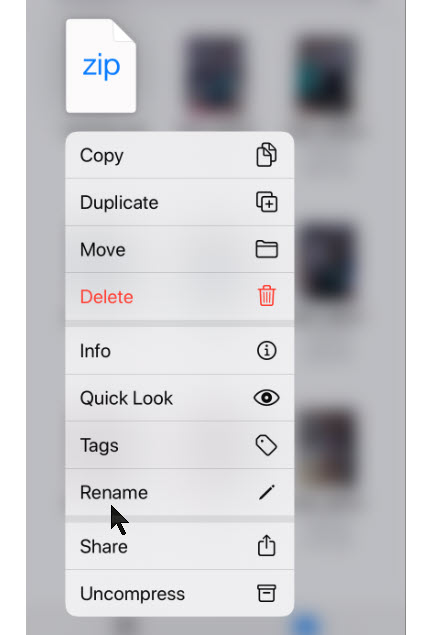
Now, tap on the Rename option and type in a new name, then tap Done. See following image:

Your new compressed file will now be displayed. Refer to below image:
Now you are able to send the Zip file as an email attachment or to a service like Dropbox, Google Drive or OneDrive to share with others.
Choosing Another Location to Save Your Files
For future downloads, you might want to change your default storage location. The downloaded files, by default, are saved to the Downloads folder in iCloud Drive in the Files app. This is a great option if you have a paid iCloud storage plan because it allows your downloaded files to sync across all your devices. But if you’re on the free 5GB plan, you might not have space for storing large files, even if they are compressed.
Thankfully, you can change the default location to local or on-line storage. To do this on your smartdevice:
- Open Settings app
- Navigate to Safari
- Select Downloads
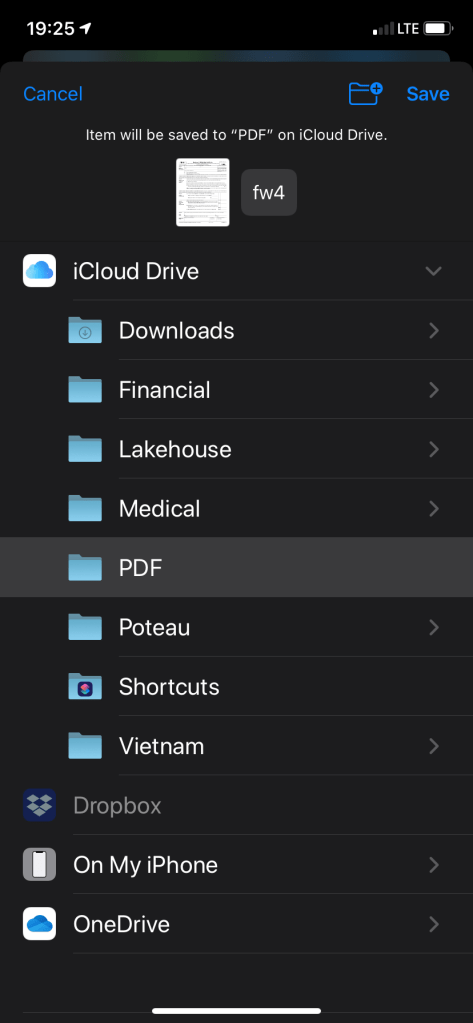
- Tap on the Other option to select any folder from the local storage (or from a cloud storage option). Note! The default is the Downloads folder. For our example, we are using the default location and folder. See below image:
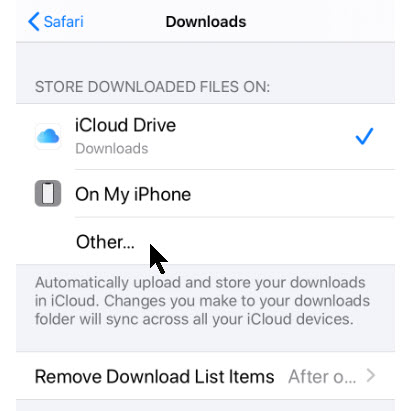
Selecting where to save your iPhone downloads
Unzip your File
The process of unzipping an archive in the Files app is relative easy.
Again, you’ll need the Zip file to be in the Files app. You can follow the same process we did in the previous section to add a Zip file to the Files app.
Navigate to the location where you saved the Zip file. Refer to below image:

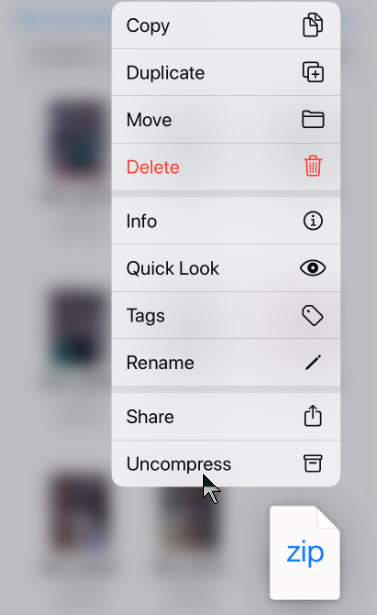
Tap and hold on the file name. Select the Uncompress option from the context pop-up menu. See following image:
You will see a new folder with the same name as the Zip file. Tap on it to see the contents of the Zip file. Your photos are now unzipped. See below image:
You have successfully compressed and uncompressed your photos.
I Would Like to Hear from You
Please feel free to leave a comment. I would love hearing from you. Do you have a computer or smart device tech question? I will do my best to answer your inquiry. Please mention the device, app and version that you are using. To help us out, you can send screenshots of your data related to your question.