Why take notes during a Zoom meeting when you can refer back to a recording of the entire call? Here’s how to record a Zoom meeting, whether you’re the host or not.
Important meetings need good records, and anyone who has taken notes knows that some details can be missed. The best way to preserve a record of a meeting is to have a video recording.
That goes doubly for remote meetings, where distractions, tech issues and other problems can lead to you missing out on essential information.
If you are using an Enterprise account to host a meeting, you may not be able to record a Zoom meeting unless your IT team has given you permission. Be sure to check with your administrator before the meeting to grant you access if you don’t have it.
If using a PC or Mac, be sure your computer has a microphone and/or camera to use Zoom to its fullest. You may also use your smartphone to record the meeting.
This if for a PC, Macs, iPhone/iPad and Android devices that support Zoom

Accessing Zoom Settings
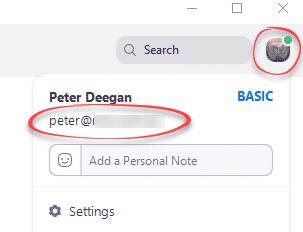
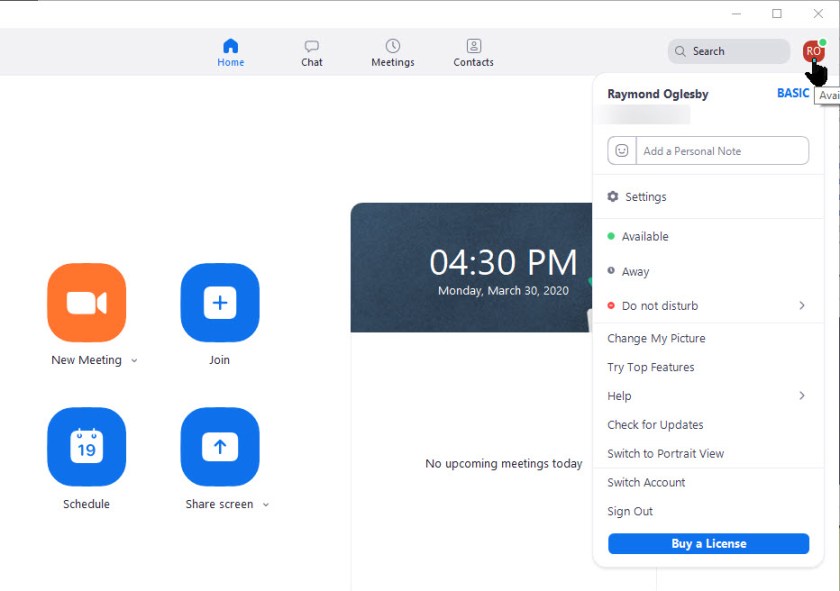
First, fire up Zoom and join an active meeting. Then click on your small profile photo in upper right-hand corner. This will open up the dialog options window. See below image:
Recording a Zoom Meeting
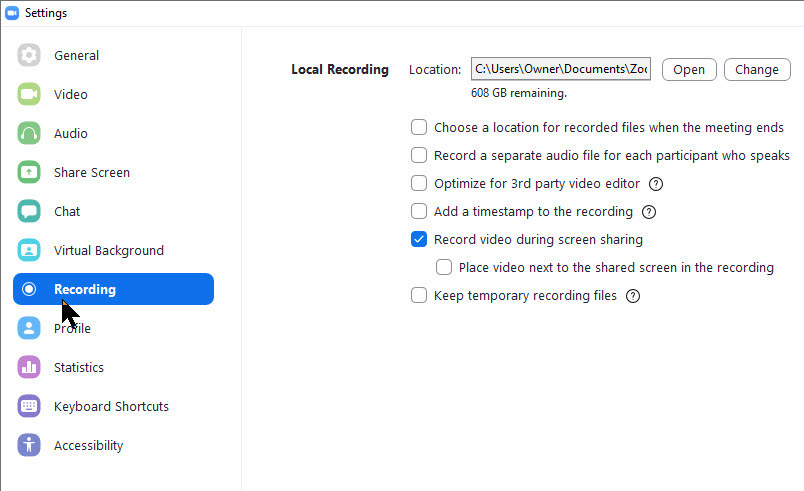
Next, click on the Settings option. The Settings options will be displayed. The Record video during screen sharing option should be checkmarked. Also, at the top of the screen is the location where your video will be stored upon completion. This folder was created when you installed Zoom. Refer to below image:
By default, only the meeting host can record the meeting, but it’s easy to grant other participants the ability to do so. The meeting host can do so by clicking on Participants while in a meeting, looking for the More button next to an individual’s name and selecting Allow Record.
Once in a meeting, those wanting to record only need to click the Record button to start capture, at which point the Record button will change into two buttons: One to Pause the recording and one to Stop recording.
When you’re done recording video, Zoom stores it temporarily in the location mentioned above. The video is encoded into MP4 format once the meeting has ended.
I Would Like to Hear from You
Please feel free to leave a comment. I would love hearing from you. Do you have a computer or smart device tech question? I will do my best to answer your inquiry. Please mention the device, app and version that you are using. To help us out, you can send screenshots of your data related to your question.