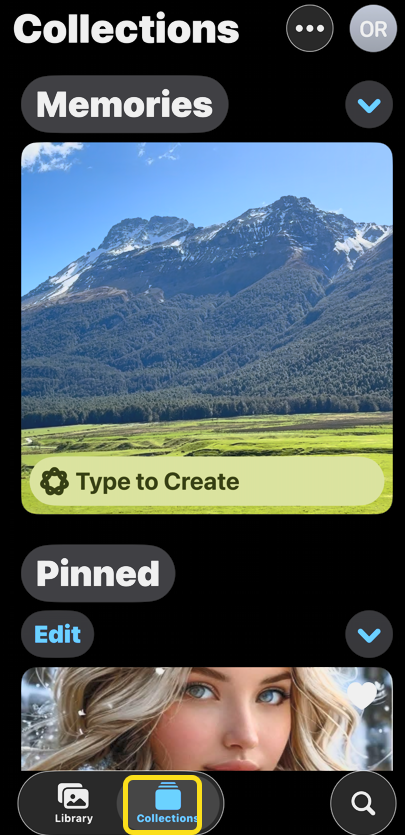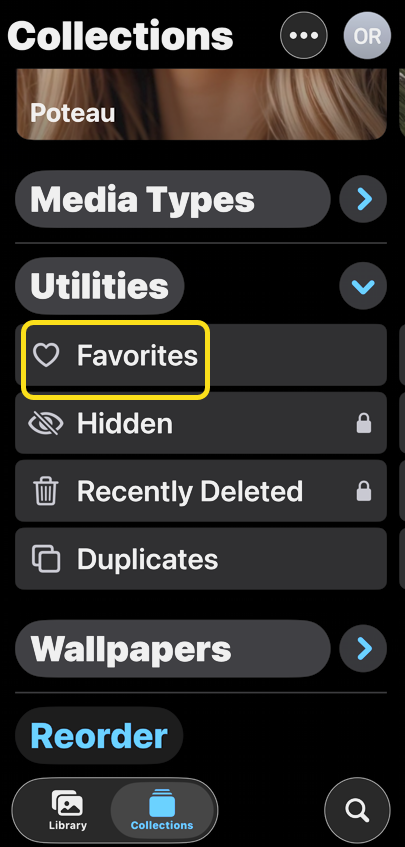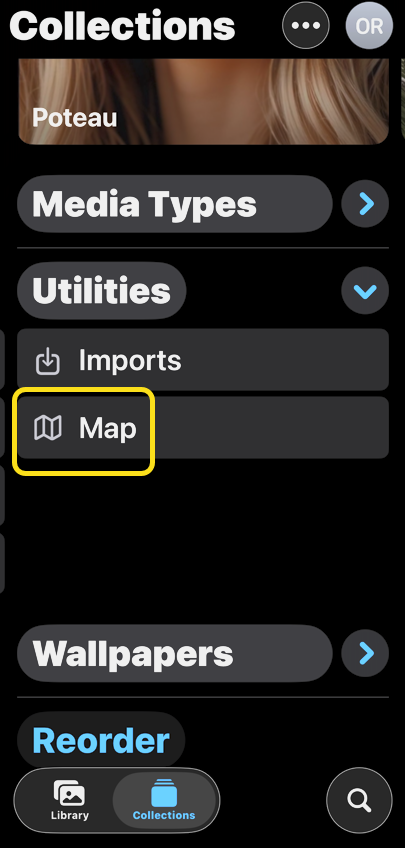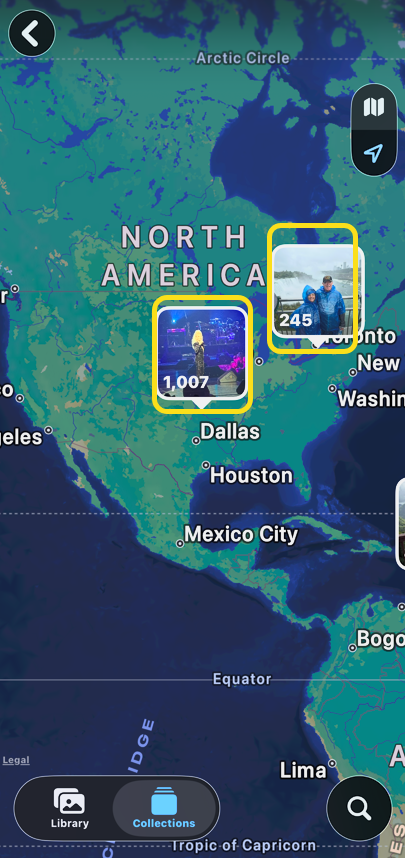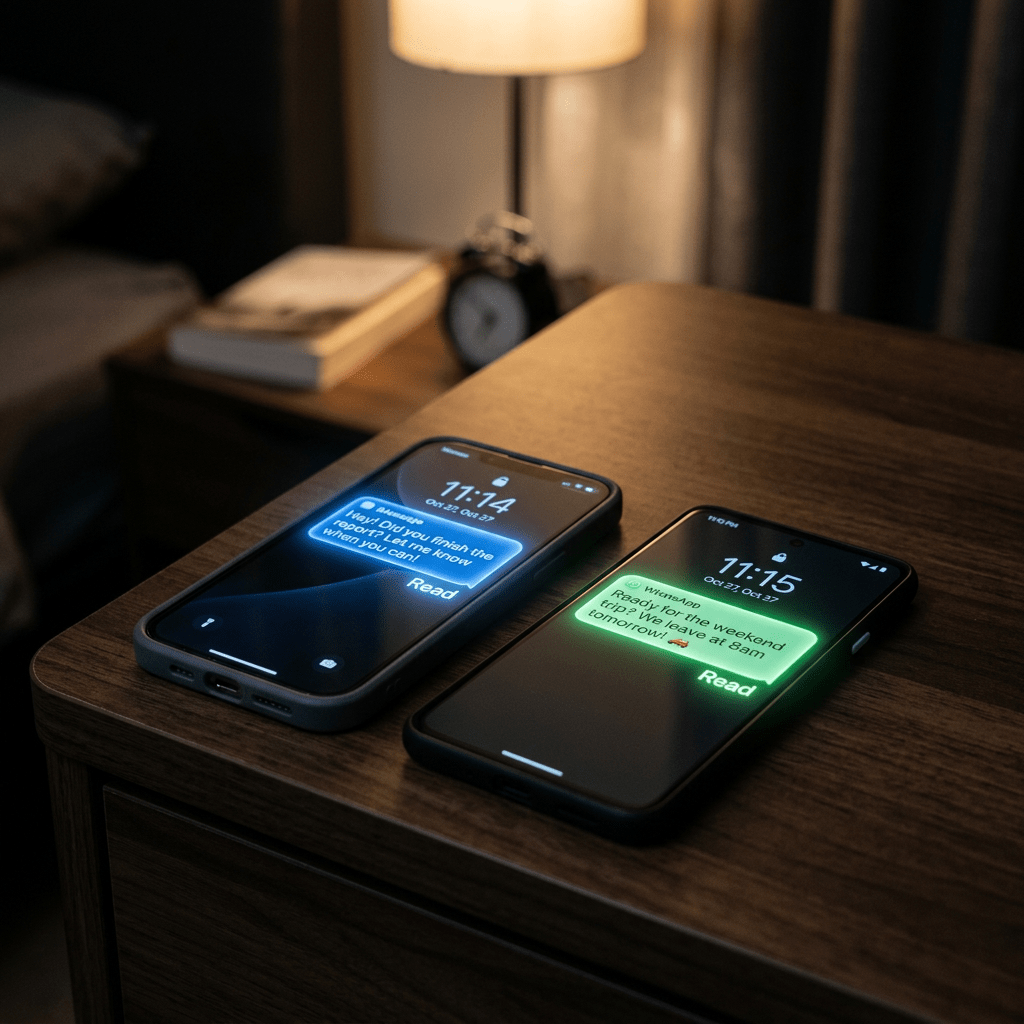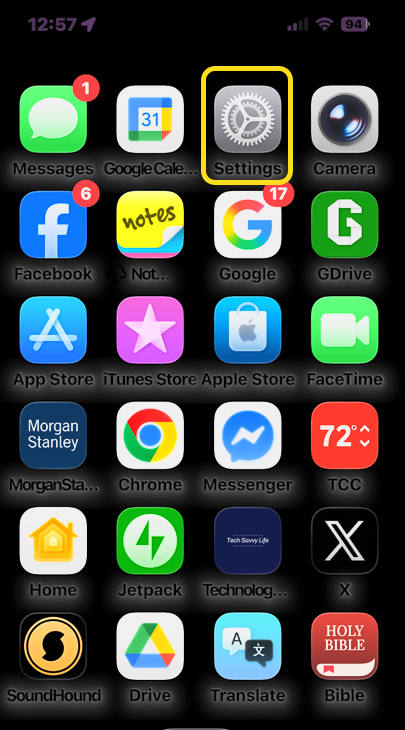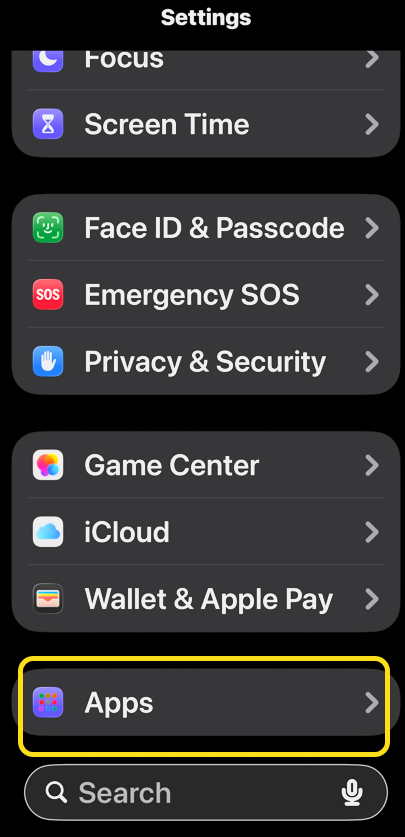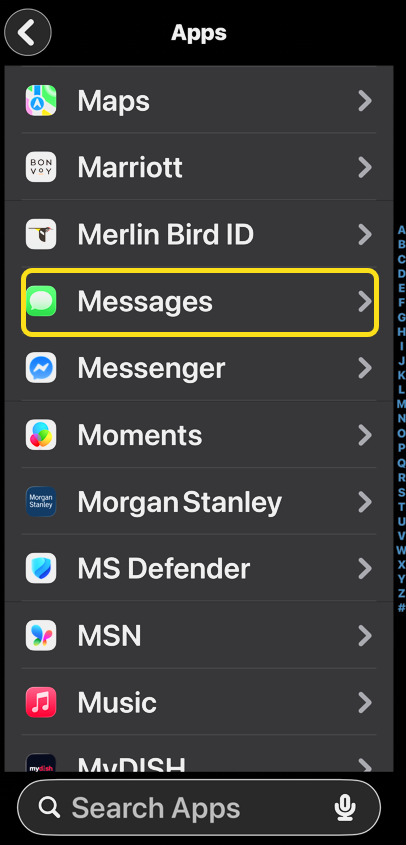
Customize Your iPhone Lock Screen Shortcuts

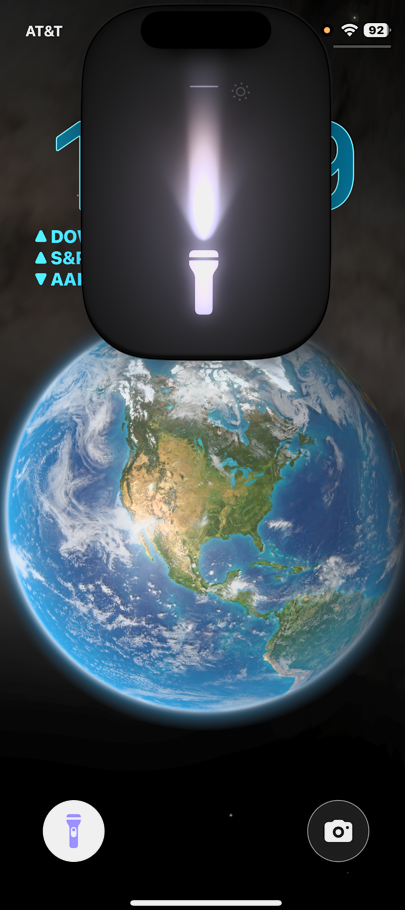
You can now customize your iPhone Lock Screen shortcuts by swapping the default flashlight or camera icons with shortcuts like the timer or alarm app. This feature allows for quicker access to preferred apps without unlocking your device, though changes must be made for each Lock Screen individually.

RAYMOND OGLESBY @RaymondOglesby2
April 7, 2026 – 4 minutes read time

If you have ever wanted to customize the shortcut buttons at the bottom of your Lock Screen, you are in luck! You can now swap out your iPhone Flashlight shortcut or Camera shortcut to pretty much any shortcut of your choosing.

With the addition of the Action button and now Camera Control buttons, the usefulness of having your Camera and Flashlight as your Lock Screen shortcuts is rapidly waning. Fortunately, you can swap these shortcuts out for different options.

It’s important to note that the shortcut will only be for that Lock Screen. If you have multiple Lock Screens, the others will have the a Flashlight and Camera defaults unless you manually change them.

Note! you can only swap out the default icons; not add new ones. (Sad, come on Apple, add this feature!). But you can add app shortcuts (widgets) below the Clock area.

  • Swap out the default flashlight and camera controls for other shortcuts, like the timer or alarm app.
  • Keep your favorite shortcuts right on your Lock Screen.
  • Access apps or actions quickly without unlocking your iPhone.

Let’s explore how to swap out the default Lock Screen shortcuts on your iPhone.

This tip was performed on an iPhone 17 Pro running iOS 26.3.

Click here to learn how to update your iPhone to the latest iOS version.

First, long-press on your Lock Screen. Refer to the image below:

LS Shortcuts 1
Long press on the lock screen

Now, tap Customize. See the image below:

LS Shortcuts 2
Tap the Customize button

Next, tap the minus symbol on the top left corner of the shortcut you want to replace. See the following image:

LS Shortcuts 3
Tap a shortcut icon

Now, tap the plus icon where the shortcut just was. Refer to the image below:

LS Shortcuts 4
Tap the shortcut icon plus sign

Next, scroll through your new shortcut options and tap the shortcut you want to add. See the image below:

LS Shortcuts 5
Select a shortcut control

Now, tap Done to finalize your Lock Screen. See the following image:

LS Shortcuts 6
Tap Done when finished

Next, you can now tap that iPhone Lock Screen shortcut to launch the new app or function you selected. Refer to the image below:

LS Shortcuts 7
Tap on your new shortcut icon to open

That’s how to change shortcuts on iPhone Lock Screen. These can easily be swapped out by following this same step procedure each time. Remember, you’ll have to do it individually for each Lock Screen.

Technology is constantly evolving, and smartphone and desktop tech rarely remains static. Therefore, the information in this post is only accurate as of the date it was written. Blog posts that are older than six months may contain instructions that are no longer compatible with your device or operating system. We hope that the content from previous posts continues to function as intended. Thank you for reading TechSavvy.Life, where technology works for you.

Technological progress has merely provided us with more efficient means for going backwards.

– Aldous Huxley

That’s it. Please feel free to share this post! One way to share is via Twitter.

Just click the Tweet icon below. This will launch Twitter where you click its icon to post the Tweet.

Checkout TechSavvy.Life for blog posts on smartphones, PCs, and Macs! You may email us at contact@techsavvy.life for comments or questions.

We value your feedback! Was this post helpful? Please share your comments with us. If you have a tech question related to your computer or smart device, feel free to reach out. Just send an email to contact@techsavvy.life, and be sure to include the device, app, and version you are using. To assist us further, you can also attach screenshots related to your inquiry.

Author’s eBook

The author’s Vietnam eBook, “Battle for Tra Bong Vietnam: Events and Aftermath,” is available on Kindle devices and the Kindle App for desktop, laptop, and smartphone. The apps are free.

The author’s Vietnam eBook on the Battle for Tra Bong Vietnam: Events and Aftermath

QuickTake: Record Video on iPhone in Photo Mode

The post explains how to quickly record videos on an iPhone using the QuickTake feature without switching from Photo mode. Users can directly access the Camera app from the Lock Screen, press and hold the Shutter button to record, and easily return to Photo mode after stopping the recording.

IRAYMOND OGLESBY @RaymondOglesby2
March 31, 2026 – 3 minutes read time

How do you take a video in picture mode on an iPhone? Use Apple’s QuickTake, the fastest way to record a video on the iPhone. 

When you find the perfect moment for a video, you do not always have time to switch between Photo and Video mode on your iPhone.Here’s how to record on an iPhone quickly right from Photo mode, and directly from your Lock Screen.

  • Record video on your iPhone without leaving photo mode.
  • Makes recording video quick and easy, so you do not miss important moments.

This tip was performed on an iPhone 17 Pro running iOS 26.3.

Click here to learn how to update your iPhone to the latest iOS version.

First, open the Camera app directly from your Lock Screen. Refer to the image below:

Video 1
Selecting the Camera icon

Next, in Photo mode, press and hold the Shutter button; your iPhone will begin video recording. See the image below:

Video 2
Press and hold the Shutter button

Now, you can drag the Shutter button to the right to temporarily lock your camera into Video mode. See the following image:

Video 3
Drag the Shutter button to the right

Next, when you are finished, tap the red square or release the Stutter button (if you did not slide it to the right) to stop recording. Refer to the image below:

Video 4
Tap or release the Shutter button

Now, when you are finished recording, your Camera app will return to Photo mode.

You now know how to record a video on an iPhone! The Camera app is truly versatile and perfect for capturing life’s most precious and exciting moments.

Technology is constantly evolving, and smartphone and desktop tech rarely remains static. Therefore, the information in this post is only accurate as of the date it was written. Blog posts that are older than six months may contain instructions that are no longer compatible with your device or operating system. We hope that the content from previous posts continues to function as intended. Thank you for reading TechSavvy.Life, where technology works for you.

Books may look like nothing more than words on a page, but they are actually an infinitely complex imaginotransference technology that translates odd, inky squiggles into pictures inside your head.

– Jasper Fforde

That’s it. Please feel free to share this post! One way to share is via Twitter.

Just click the Tweet icon below. This will launch Twitter where you click its icon to post the Tweet.

Checkout TechSavvy.Life for blog posts on smartphones, PCs, and Macs! You may email us at contact@techsavvy.life for comments or questions.

Author’s eBook

The author’s Vietnam eBook, “Battle for Tra Bong Vietnam: Events and Aftermath,” is available on Kindle devices and the Kindle App for desktop, laptop, and smartphone. The apps are free.

The author’s Vietnam eBook on the Battle for Tra Bong Vietnam: Events and Aftermath

Quick Access: View Notifications on iPhone Lock Screen

The article discusses how to quickly view notifications from the Lock screen on an iPhone 17 Pro running iOS 26.3. It outlines two methods: swiping up on the Lock screen or tapping the unread notification count. Additionally, it provides a setup guide for enabling notification previews.

RAYMOND OGLESBY @RaymondOglesby2
March 24, 2026 – 3 minutes read time

Want to view notifications fast? There are two ways of doing this from your Lock screen. We used to open my iPhone to view notifications; now there’s a faster way. Let’s explore this nifty feature.

View your notifications quickly.
See the number of unread notifications from the Lock screen.

This tip was performed on an iPhone 17 Pro running iOS 26.3.

Click here to learn how to update your iPhone to the latest iOS version.

First, open Settings, then tap Notifications. Refer to the image below:

Notifications 1
Selecting the Notifications option

Next, under Display As, tap on the Count option. See the below image;

Notifications 2
Selecting the Count option

Now, scroll down to Notification Style section and tap on the Mail option. See the following image

Notifications 3
Selecting the Mail option

Next, on your Mail screen:

Enable Allow Notifications toggle
Checkmark Notification Cebter toggle
Enable Badges toggle

Refer to the image below:

Notifications 4
Enabling three items

Now, under Settings, tap Face ID & Passcode option. See the image below:

Notifications 6
Selecting the Face ID & Passcode option

Next, enable the Notification Center toggle. See the following image:

Notifications 7
Enabling the NotificationCenter toggle

Now that you have finished the setup process, there are two ways to view your notifications on the Lock screen. On your activated Lock screen, hold your finger near the bottom and slowly swipe up until the Notification Center appears. Refer to the image below:

Notifications 5
Slowly swipe up to reveal Notification Center

Or if you have unread Notifications, the number will be displayed at the bottom of your Lock screen. Just tap on it to view your notifications. See the image below:

Notifications 8
Tap on Notification to reveal the Notification Center

Technology is constantly evolving, and smartphone and desktop tech rarely remains static. Therefore, the information in this post is only accurate as of the date it was written. Blog posts that are older than six months may contain instructions that are no longer compatible with your device or operating system. We hope that the content from previous posts continues to function as intended. Thank you for reading TechSavvy.Life, where technology works for you.

We are stuck with technology when what we really want is just stuff that works.

– Douglas Adams

– Douglas AdamsThat’s it. Please feel free to share this post! One way to share is via Twitter.

Just click the Tweet icon below. This will launch Twitter where you click its icon to post the Tweet.

Checkout TechSavvy.Life for blog posts on smartphones, PCs, and Macs! You may email us at contact@techsavvy.life for comments or questions.

We value your feedback! Was this post helpful? Please share your comments with us. If you have a tech question related to your computer or smart device, feel free to reach out. Just send an email to contact@techsavvy.life, and be sure to include the device, app, and version you are using. To assist us further, you can also attach screenshots related to your inquiry.

Author’s eBook

The author’s Vietnam eBook, “Battle for Tra Bong Vietnam: Events and Aftermath,” is available on Kindle devices and the Kindle App for desktop, laptop, and smartphone. The apps are free.
The author’s Vietnam eBook on the Battle for Tra Bong Vietnam: Events and Aftermath

Quick Guide to Sharing Contacts on iPhone

The post explains how to easily share iPhone contacts through the Contacts app without the need for manual entry. Users can customize which parts of the contact card to share and choose various sharing methods like email or AirDrop. It emphasizes simplicity and efficiency in sharing contact information.

RAYMOND OGLESBY @RaymondOglesby2
March 3, 2026 – 3 minutes read time

You can share iPhone contacts (also known as a contact card) directly from the Contacts app on your iPhone, and it does not involve copying and pasting or tediously typing it out!

When you add people to your contacts, a contact card is automatically created on your iPhone for each contact so that all of the contact’s information is grouped into one place. This makes it simple to share or send a contact on iPhone. Let’s explore how to share a contact on iPhone.

  • Learn how to share contacts on iPhone so you can send your own or someone else’s contact card; no more typing out numbers!
  • Customize which parts of the contact card you want to share; you can leave off the email address, phone number, first name, and/or last name.

This tip was performed on an iPhone 17 Pro running iOS 26.2.1.

Click here to learn how to update your iPhone to the latest iOS version.

First, open the Contacts app. In our example, we are selecting a contact group from Contacts. Refer to the image below:

Contacts 1
Opening your Contacts app

Next, tap the contact you wish to share. See the image below:

Contacts 2
Selecting a contact

Now, tap Share Contact. See the following image:

Contacts 3
Selecting the Share Contact option

Next, tap the blue dot next to any part of the contact card you do NOT wish to share, then tap the check mark in the blue circle at upper right. Refer to the image below:

Contacts 4
Unselect items you do NOT want to share and save your results

Now, tap a sharing method, such as email, text message, AirDrop, and more. See the image below:

Contacts 5
Selecting a sharing method

Next, choose a recipient and tap the Send icon to share the contact. See the following image:

Contacts 6
Selecting a recipient and sending the contact info

Now you know how to send contact information on iPhone to recipients using the contact card on your phone! It’s never been easier to share a contact on iPhone.

Technology is constantly evolving, and smartphone and desktop tech rarely remains static. Therefore, the information in this post is only accurate as of the date it was written. Blog posts that are older than six months may contain instructions that are no longer compatible with your device or operating system. We hope that the content from previous posts continues to function as intended. Thank you for reading TechSavvy.Life, where technology works for you.

It’s supposed to be automatic, but actually, you have to push this button.

– John Brunner

That’s it. Please feel free to share this post! One way to share is via Twitter.

Just click the Tweet icon below. This will launch Twitter where you click its icon to post the Tweet.

Checkout TechSavvy.Life for blog posts on smartphones, PCs, and Macs! You may email us at contact@techsavvy.life for comments or questions.

We value your feedback! Was this post helpful? Please share your comments with us. If you have a tech question related to your computer or smart device, feel free to reach out. Just send an email to contact@techsavvy.life, and be sure to include the device, app, and version you are using. To assist us further, you can also attach screenshots related to your inquiry.

Author’s eBook

The author’s Vietnam eBook on the “Battle for Tra Bong Vietnam: Events and Aftermath” can be accessed from a Kindle device or the Kindle App for a desktop or smartphone. The apps are free.

The author’s Vietnam eBook on the Battle for Tra Bong Vietnam: Events and Aftermath

How to Disable ChatGPT on Your iPhone

Apple has integrated ChatGPT into iPhones through Apple Intelligence, enhancing user interaction with Siri. Users can disable this feature for privacy concerns or to avoid supporting ChatGPT. The process involves modifying settings in the Apple Intelligence menu. Overall, users can maintain privacy while utilizing AI functionalities.

InRAYMOND OGLESBY @RaymondOglesby2
February 24, 2026 – 3 minutes read time

Apple Intelligence enhances how you use your iPhone, including when you speak to Siri. Thanks to a collaboration between Apple and OpenAI, you can now use ChatGPT on your iPhone with Apple Intelligence. But if you have privacy concerns or prefer not to support ChatGPT, you can disable it.

Does the iPhone have ChatGPT? Apple has natively integrated ChatGPT on iPhone, so that if Apple Intelligence fails to find an answer for you, it can defer to ChatGPT. This works without a ChatGPT account or subscription and allows you to use the AI chatbot a bit more anonymously than if you were to use the app. However, some may still have reservations about using AI unnecessarily or having their searches logged by ChatGPT. If you do not want to use ChatGPT on your iPhone, you can disable it. Let’s explore how to turn off AI on your iPhone.

  • Maintain privacy by preventing ChatGPT from accessing your information.
  • Avoid supporting ChatGPT if you oppose its environmental impact.

This tip was performed on an iPhone 17 Pro running iOS 26.2.

Click here to learn how to update your iPhone to the latest iOS version.

First, open the Settings app, and tap the Apple Intelligence option. Refer to the image below:

ChatGPT 1
Selecting the Apple Intelligence option

Now, scroll down to Extensions and tap ChatGPT. See the below image:

ChatGPT 2
Selecting the ChatGPT option

Next, switch off the toggle next to Use ChatGPT to disable it. See the following image:

ChatGPT 3
Turn Off the ChatGPT toggle

Now, when ChatGPT is turned off, you will see a Set Up prompt instead of a toggle. Refer to the below image:

ChatGPT 4
The Use ChatGPT option is now in Set Up mode

Next, when ChatGPT disabled, your iPhone will continue to prompt you to set it up, so tap the toggle next to Setup Prompts to turn this off as well. See the below image:

ChatGPT 5
Turn Off the Setup Prompts toggle

Note! If you want to enable ChatGPT, go back to Extensions and tap the ChatGPT toggle to on. 

That’s how to turn off ChatGPT on iOS. Now you can rely exclusively on the privacy of Apple Intelligence for all your AI needs.

Technology is constantly evolving, and smartphone and desktop tech rarely remains static. Therefore, the information in this post is only accurate as of the date it was written. Blog posts that are older than six months may contain instructions that are no longer compatible with your device or operating system. We hope that the content from previous posts continues to function as intended. Thank you for reading TechSavvy.Life, where technology works for you.

The technology you use impresses no one. The experience you create with it is everything.

 – Sean Gerety

That’s it. Please feel free to share this post! One way to share is via Twitter.

Just click the Tweet icon below. This will launch Twitter where you click its icon to post the Tweet.

Checkout TechSavvy.Life for blog posts on smartphones, PCs, and Macs! You may email us at contact@techsavvy.life for comments or questions.

We value your feedback! Was this post helpful? Please share your comments with us. If you have a tech question related to your computer or smart device, feel free to reach out. Just send an email to contact@techsavvy.life, and be sure to include the device, app, and version you are using. To assist us further, you can also attach screenshots related to your inquiry.

Author’s eBook

The author’s Vietnam eBook, “Battle for Tra Bong Vietnam: Events and Aftermath,” is available on Kindle devices and the Kindle App for desktop, laptop, and smartphone. The apps are free.
The author’s Vietnam eBook on the Battle for Tra Bong Vietnam: Events and Aftermath

Improve iPhone Text Size for Better Readability

This post offers guidance on enhancing readability on iPhones and iPads through accessibility settings. Users can learn to bold text, adjust size, and add navigation aids like button borders and on/off labels. The tutorial outlines steps for changing these settings, ensuring a more user-friendly experience for visually impaired individuals.

RAYMOND OGLESBY @RaymondOglesby2
February 10, 2026 – 4 minutes read time

Are you tired of squinting while looking at content on your iPhone? Good news! You can change the display and text size on your iPhone and iPad for easier readability.

Apple’s accessibility settings allow individuals to customize their display settings so they can more easily navigate and view content on their devices. Follow the steps below to learn how to bold text on your iPhone and iPad, change text size, and add button shapes and toggle labels.

  • Make text larger and bolded for easier readability of text messages, emails, and more.
  • Add borders to buttons and on/off labels to toggles for easier navigation.

This tip was performed on an iPhone 17 Pro running iOS 26.2.

Click here to learn how to update your iPhone to the latest iOS version.

First, open the Settings app. Refer to the image below:

Font 1
Accessing Settings

Next scroll down and tap Accessibility. See the image below:

Font 2
Selecting the Accessibility option

Now, tap Display & Text Size. See the following image:

Font 3
Selecting the Display & Text Size option

Next, if you want the text on your iPhone or iPad to be bolded, tap the Bold Text toggle to enable it. The toggle is green when enabled. Refer to the image below:

Font 4
Enabling the Bold Text toggle

Now, to change the text size, tap Larger Text.See the image below:

Font 5
Selecting the Larger Text option

Next, tap to enable the Larger Accessibility Sizes toggle. Once enabled, apps that allow you to change the text size will display your preferred font size. See the following image:

Font 6
Enabling the Larger Accessibility Sizes toggle

Now, once you have set your preferred font size, tap the back icon to return to main Display & Text Size menu. Refer to the image below:

Font 8
Go back to main screen

Next. to set your preferred text size, drag the slider left to decrease font size or right to increase font size. See the image below:

Font 7
Drag the slider to increase or decrease font size

Now, if you want to add on/off labels to toggles, you can also tap to enable the On/Off Labels toggle. The “I” indicates the toggle is on, and “O” indicates it is off. See the following image:

Font 9
Enabling the On/Off Labels toggle

Finally, you can toggle on Show Borders (our favorite) to get thin borders around buttons that would otherwise lack a clear border. Refer to the image below:

Font 10
Enabling the Show Borders option

Technology is constantly evolving, and smartphone and desktop tech rarely remains static. Therefore, the information in this post is only accurate as of the date it was written. Blog posts that are older than six months may contain instructions that are no longer compatible with your device or operating system. We hope that the content from previous posts continues to function as intended. Thank you for reading TechSavvy.Life, where technology works for you.

The most technologically efficient machine that man has ever invented is the book.

– Northrop Frye

You are finished. Please feel free to share this post! One way to share is via Twitter.

Just click the Tweet icon below. This will launch Twitter where you click its icon to post the Tweet.

Checkout TechSavvy.Life for blog posts on smartphones, PCs, and Macs! You may email us at contact@techsavvy.life for comments or questions.

We value your feedback! Was this post helpful? Please share your comments with us. If you have a tech question related to your computer or smart device, feel free to reach out. Just send an email to contact@techsavvy.life, and be sure to include the device, app, and version you are using. To assist us further, you can also attach screenshots related to your inquiry.

AAuthor’s eBook

The author’s Vietnam eBook on the “Battle for Tra Bong Vietnam: Events and Aftermath” can be accessed on a Kindle device or the Kindle App for a desktop or smartphone. The apps are free.
The author’s Vietnam eBook on the Battle for Tra Bong Vietnam: Events and Aftermath

How to Control Background App Refresh on iPhone

Background App Refresh can consume data and battery life on your device. Users can optimize its usage by enabling it only when connected to Wi-Fi. This setting helps preserve cellular data and battery life while keeping apps up-to-date when needed. Instructions for adjusting these settings are provided for iPhone users.

RAYMOND OGLESBY @RaymondOglesby2
February 3 , 2026 – 4 minutes read time

Background App Refresh can siphon off your data and battery without you noticing. But you can choose to turn Background App Refresh on only when your device is connected to Wi-Fi. That way, you can enjoy the perks of the feature without worrying about how much data it’s using.

For years, it has been recommended to turn off Background App Refresh on your device to save battery life and cellular data. Background App Refresh automatically refreshes apps you have open in the background, so when you go back to them, the page is already up to date and loaded. This can consume data and battery life. Here’s how to set background app refresh to Wi-Fi only on iPhone.

Note! All iPhone users should setup this tip. Why Apple does not make this the default is beyond us.

  • Save battery life by preventing apps from constantly refreshing.
  • Ensure you do not use up extra cellular data by allowing apps to refresh only over Wi-Fi.

This tip was performed on an iPhone 17 Pro running iOS 26.2.

Click here to learn how to update your iPhone to the latest iOS version.

First, open Settings, and select General. Refer to the image :

Refresh 1
Selecting the General option

Next, tap Background App Refresh. See the image below:

Refresh 2
Selecting the Background App Refresh option

Now, select Background App Refresh again. See the following image:

Refresh 3
Selecting the Background App Refresh option again

Next, select Wi-Fi to turn on Background App Refresh only when your device is connected to Wi-Fi. Refer to the image below:

Refresh 4
Turning Wi-Fi on

Now, you can enable/disable background refresh per app by tapping its toggle. see the image below:

efresh 5
Disable Background App Refresh

That’s how to adjust the settings for background app refresh on iPhone. If you want to know how to turn off background app refresh completely, just select Off in the last step. This is a good option if you do not want your apps updating without you knowing. This can stop updates you actually do not want from being installed on your phone (which can be a huge advantage), but it will be annoying when you open an app you need to use now, only to get a notification that you will have to update before you can use it.

Technology is constantly evolving, and smartphone and desktop tech rarely remains static. Therefore, the information in this post is only accurate as of the date it was written. Blog posts that are older than six months may contain instructions that are no longer compatible with your device or operating system. We hope that the content from previous posts continues to function as intended. Thank you for reading TechSavvy.Life, where technology works for you.

Our technological powers increase, but the side effects and potential hazards also escalate.

. – Alvin Toffler

That’s it. Please feel free to share this post! One way to share is via Twitter.

Just click the Tweet icon below. This will launch Twitter where you click its icon to post the Tweet.

Checkout TechSavvy.Life for blog posts on smartphones, PCs, and Macs! You may email us at contact@techsavvy.life for comments or questions.

We value your feedback! Was this post helpful? Please share your comments with us. If you have a tech question related to your computer or smart device, feel free to reach out. Just send an email to contact@techsavvy.life, and be sure to include the device, app, and version you are using. To assist us further, you can also attach screenshots related to your inquiry.

Author’s eBook

The author’s Vietnam eBook on the “Battle for Tra Bong Vietnam: Events and Aftermath” can be accessed from a Kindle device or the Kindle App for a desktop or smartphone. The apps are free.
The author’s Vietnam eBook on the Battle for Tra Bong Vietnam: Events and Aftermath

Quickly Disable iPhone Notifications on Lock Screen

This post explains how to quickly disable specific app notifications from the iPhone Lock Screen, simplifying the process compared to accessing the Notification Settings. Users can swipe left on a notification, select Options, and then turn off alerts, but must be cautious as there’s no confirmation to revert changes.

RAYMOND OGLESBY @RaymondOglesby2
January 27, 2026 – 3 minutes read time

Did you know that you can quickly turn off specific app notifications without having to dig deep in your notifications settings? Let’s learn how to turn notifications off on iPhone’s Lock Screen in just a few quick steps. This is an easy way to reduce declutter by turning off iPhone notifications as soon as they pop up.

You may already know how to turn off notifications on iPhone in the Notification Settings. However, it is even easier to turn off an unwanted app notification the moment it pops up, directly from your Lock Screen.

  • Turn off specific app notifications the moment you get them.
  • Avoid the hassle of navigating to Notification Settings and disable notifications directly from your Lock Screen.

This tip was performed on an iPhone 17 Pro running iOS 26.2.

Click here to learn how to update your iPhone to the latest iOS version.

First, locate a notification from an app on your Lock Screen that you wish to silence. Refer to the image below:

Notifications 1
Selecting a notification

Next, swipe slowly from right to left over the notification. See the below image:

Notifications 2
Swipe the notification slowly

Now, tap Options. If you tap Clear, just this one notification will be removed. See the following image:

Notifications 3
Selecting Options

Next, select Turn Off. Refer to the image below:

Notifications 4
Selecting to Turn Off all notifications for this app

Another trick is that instead of tapping Turn Off, you can tap View Settings which will take you to the page with all the settings for that particular app.

Note! There is no confirmation step once you tap Turn Off, so if you accidentally turn off the wrong app notifications, you will have to turn them back on via Settings

Also, for example if you turn off Best Buy app Deals notifications it will generally disable all alerts from the app, to include order and shipping uupdates, so be careful what you turn off.

Now you know how to turn off iPhone notifications directly from the Lock Screen!

Technology is constantly evolving, and smartphone and desktop tech rarely remains static. Therefore, the information in this post is only accurate as of the date it was written. Blog posts that are older than six months may contain instructions that are no longer compatible with your device or operating system. We hope that the content from previous posts continues to function as intended. Thank you for reading TechSavvy.Life, where technology works for you.

The saddest aspect of life right now is that science gathers knowledge faster than society gathers wisdom.

– Isaac Asimov

That’s it. Please feel free to share this post! One way to share is via Twitter.

Just click the Tweet icon below. This will launch Twitter where you click its icon to post the Tweet.

Checkout TechSavvy.Life for blog posts on smartphones, PCs, and Macs! You may email us at contact@techsavvy.life for comments or questions.

We value your feedback! Was this post helpful? Please share your comments with us. If you have a tech question related to your computer or smart device, feel free to reach out. Just send an email to contact@techsavvy.life, and be sure to include the device, app, and version you are using. To assist us further, you can also attach screenshots related to your inquiry.

Author’s eBook

The author’s Vietnam eBook on the “Battle for Tra Bong Vietnam: Events and Aftermath” can be accessed from a Kindle device or the Kindle App for a desktop or smartphone. The apps are free.
The author’s Vietnam eBook on the Battle for Tra Bong Vietnam: Events and Aftermath

Transform Your Writing with Apple Intelligence Tools

Apple Intelligence is a new AI feature for iPhone 15 Pro and later, allowing users to rewrite text in seconds. It includes tools for improving writing, managing messages, and ensuring privacy. Despite its capabilities, the author suggests it needs refinement compared to Grammarly Pro. Compatibility and usage instructions are provided.

RAYMOND OGLESBY @RaymondOglesby2
January 20, 2026 – 4 minutes read time

Now, there’s an easy way to rewrite any text or email in just a matter of seconds. With Apple Intelligence, you can now let your iPhone’s AI rewrite text for you.

Apple Intelligence is capable of using handy rewriting tools to change up any passage of text that you have typed, as long as you are using an iPhone 15 Pro or later model. Let’s explore this AI feature.

Apple Intelligence is a suite of AI-powered tools that use your personal data to generate information and recommendations tailored to you. It’s available on the iPhone, iPad, and Mac, and is integrated into the core of the operating system and existing apps. 

Apple Intelligence includes features like: 

  • Image Playground: A tool for generating cartoon-style images based on text descriptions 
  • Genmoji: A tool for creating emojis for any situation 
  • Writing Tools: Tools for enhancing your writing, including ChatGPT integration and reformatting tools like List and Table 
  • Priority Messages: A tool for prioritizing messages in your inbox 
  • Notification summaries: A tool for scanning long or stacked notifications with key details 
  • Reduce Interruptions: A Focus that surfaces only notifications that might need immediate attention 
  • Smart Reply: A tool in Mail that identifies questions you were asked in an email and offers relevant selections to include in your response 

Apple Intelligence is designed to protect your privacy at every step. It’s aware of your personal information without collecting it, and it uses on-device processing and Private Cloud Compute to handle more complex requests. 

  • Rewrite and improve typed text anywhere on your iPhone.
  • Make sure your messages are always written correctly.

This tip works on the iPhone 15 Pro or later running iOS 18.1 or later. Screenshots are from iPhone 17 Pro running iOS 26.1.

Click here to learn how to update your iPhone to the latest iOS version.

First, in any area where you have typed text, such as an email, select the text. Refer to the below image:

AI 1
selecting an email text

Next, you can tap Rewrite or the Apple Intelligence icon. If you tapped the Apple Intelligence icon, select Rewrite. See the image below:

AI 2
Selecting the Rewrite option

Now, tap Original to see the original. See the following image:

AI 3
Selecting the Original option

Next, tap Rewrite to rewrite it again. Refer to the image below:

AI 4
Selecting the Rewrite option again

Now, you can use the Undo and Redo buttons to cycle through different rewrites. See the image below:

AI 5
Selecting the Undo option

Next, you can tap the Rewrite icon to rewrite the text again. See the following image:

AI 6
Selecting the Rewrite icon

Now, select  Done to save the rewritten text. Refer to he image below:

AI 7
Save your changes

That’s how to use the new Apple Intelligence rewrite tools to change up your text after you have typed it.

In the author’s opinion, Apple Intelligence is lacking and needs refinements. We prefer to use Grammarly Pro.

Technology is constantly evolving, and smartphone and desktop tech rarely remains static. Therefore, the information in this post is only accurate as of the date it was written. Blog posts that are older than six months may contain instructions that are no longer compatible with your device or operating system. We hope that the content from previous posts continues to function as intended. Thank you for reading TechSavvy.Life, where technology works for you.

Technology like art is a soaring exercise of the human imagination.

  • – Daniel Bell

That’s it. Please feel free to share this post! One way to share is via Twitter.

Just click the Tweet icon below. This will launch Twitter where you click its icon to post the Tweet.

Checkout TechSavvy.Life for blog posts on smartphones, PCs, and Macs! You may email us at contact@techsavvy.life for comments or questions.

We value your feedback! Was this post helpful? Please share your comments with us. If you have a tech question related to your computer or smart device, feel free to reach out. Just send an email to contact@techsavvy.life, and be sure to include the device, app, and version you are using. To assist us further, you can also attach screenshots related to your inquiry.

Author’s eBook

The author’s Vietnam eBook on the “Battle for Tra Bong Vietnam: Events and Aftermath” can be accessed from a Kindle device or the Kindle App for a desktop or smartphone. The apps are free.
The author’s Vietnam eBook on the Battle for Tra Bong Vietnam: Events and Aftermath

How to Customize Liquid Glass on iOS 26.1

The iOS 26 update unveiled Liquid Glass, a controversial new user interface with a glassy appearance. User reactions were mixed, prompting Apple to introduce a translucency adjustment option in iOS 26.1. Users can customize the appearance between clear and tinted according to their preferences and accessibility needs.

RAYMOND OGLESBY @RaymondOglesby2
January 6, 2026 – 3 minutes read time

The iOS 26 update introduced us to a redesigned version of iOS called Liquid Glass. The user response to Liquid Glass was very divisive, with some people loving it and others absolutely hating it. Thankfully, Apple has added a new setting to adjust how translucent Liquid Glass is, so you can decide how you want your iPhone to look.

What is Liquid Glass? Liquid Glass is the name Apple has given to the style of its new user interface in iOS 26, due to its glassy appearance. Because of the divisive response to Liquid Glass, iOS 26.1 added an option to adjust the translucency. Let’s explore how to adjust your iPhone’s Liquid Glass.

  • Make it easier to see certain icons by making Liquid Glass tinted.
  • Customize Liquid Glass to look how you want it to look.

This tip was performed on an iPhone 17Pro running iOS 26.1.

Click here to learn how to update your iPhone to the latest iOS version.

First, open the Settings app and select Display & Brightness. Refer to the image below:

Display 1
Selecting Display & Brightness option

Next, tap Liquid Glass. See the image below:

Display 2
Selecting Liquid Glass option

Now, tap  Clear if you want Liquid Glass to have a translucent appearance (you can see a preview above the option you select). See the following image:

Display 3
Selecting Clear option

Next, if you are unable to select Tinted, head to:

Settings > Accessibility > Display & Text Size

and turn Reduce Transparency and Increase Contrast toggles to OFF, then return back to the Liquid Glass option. Refer to the image below:

Display 4
Setting Reduce Transparency and Increase Contrast toggles to OFF

Now, select  Tinted if you want Liquid Glass to have a more opaque appearance (you can see a preview above the option you select). See the image below:

Display 5
Selecting Tinted option

That’s how to change Liquid Glass on iOS 26.1! If you have trouble seeing different UI elements, the Tinted option might be better, while Clear is good if you want to maintain the effect as Apple intended.

Technology is constantly evolving, and smartphone and desktop tech rarely remains static. Therefore, the information in this post is only accurate as of the date it was written. Blog posts that are older than six months may contain instructions that are no longer compatible with your device or operating system. We hope that the content from previous posts continues to function as intended. Thank you for reading TechSavvy.Life, where technology works for you.

One machine can do the work of fifty ordinary men. No machine can do the work of one extraordinary man . – Elbert Hubbard

That’s it. Please feel free to share this post! One way to share is via Twitter.

Just click the Tweet icon below. This will launch Twitter where you click its icon to post the Tweet.

Checkout TechSavvy.Life for blog posts on smartphones, PCs, and Macs! You may email us at contact@techsavvy.life for comments or questions.

We value your feedback! Was this post helpful? Please share your comments with us. If you have a tech question related to your computer or smart device, feel free to reach out. Just send an email to contact@techsavvy.life, and be sure to include the device, app, and version you are using. To assist us further, you can also attach screenshots related to your inquiry.

Author’s eBook

The author’s Vietnam eBook on the “Battle for Tra Bong Vietnam: Events and Aftermath” can be accessed from a Kindle device or the Kindle App for a desktop or smartphone. The apps are free.
The author’s Vietnam eBook on the Battle for Tra Bong Vietnam: Events and Aftermath